


Many home cooks wonder if they can make bread in an air fryer, and the short answer is a resounding yes. While these countertop appliances are primarily known for crisping frozen snacks, their core function is essentially high-powered baking convection. By harnessing intense heat circulation and precise airflow, you can produce loaves with satisfying textures that rival traditional oven-baked results.
Whether you are aiming for a rustic artisan loaf or a simple, quick soda bread, understanding the mechanics of your machine is the key to success. This exploration into the world of countertop baking will help you master the process and achieve bakery-quality results right in your kitchen.
The Mechanics of Air Fryer Baking
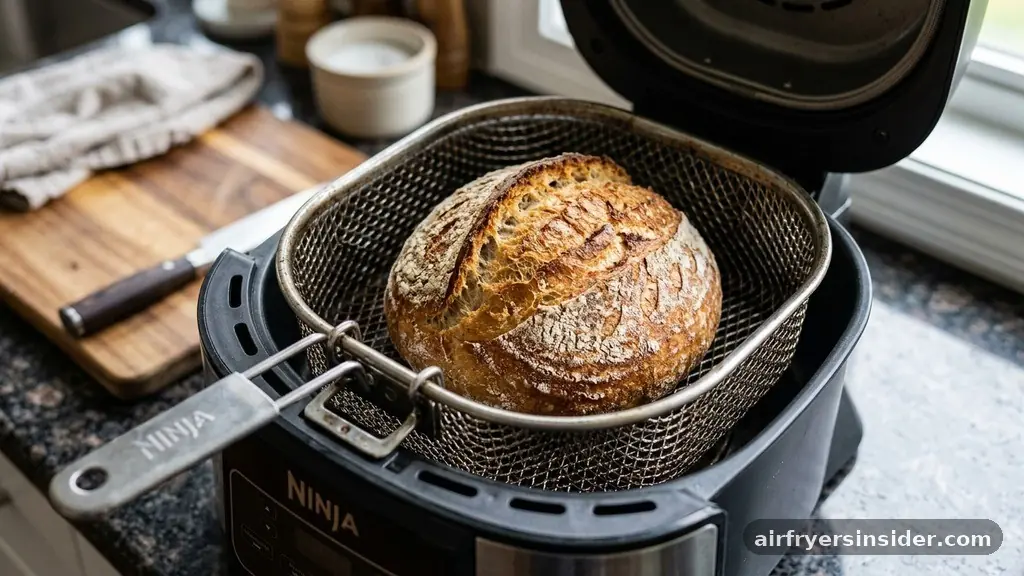
At its heart, an air fryer is a compact convection oven. When you ask whether you can make bread in an air fryer, you are really asking if your appliance can replicate the environment of a professional bread oven. The primary difference lies in the proximity of the heating element to the food.
Because the chamber is smaller, the fan speed is significantly higher, which leads to rapid heat transfer. This is excellent for creating a golden-brown crust but can be challenging for the interior of a dense loaf.
To succeed, you must think of your air fryer as a specialized tool for smaller batches. Traditional ovens rely on ambient heat that builds up slowly, whereas an air fryer hits peak temperature almost instantly. This means your dough needs to be ready to react to that heat the moment it enters the basket.
You will find that smaller loaves, rolls, or even flatbreads perform much better than large, heavy sourdough boules. The goal is to balance the speed of the exterior setting with the time needed for the interior to finish baking without burning the top.
Essential Tools for Successful Results
You do not need a massive kit to start, but using the right equipment makes a significant difference. Since most air fryers have a mesh air fryer basket, you cannot simply place raw dough directly on the surface. You will need a suitable vessel to hold the dough as it sets.
A small, oven-safe baking tin or a silicone mold works perfectly for this purpose. These tools help maintain the shape of the bread while preventing it from sagging through the basket’s gaps.
Another non-negotiable item is parchment paper. Using a small circle or square of parchment under your dough ensures easy removal and prevents sticking. If you are feeling adventurous, you might even consider a miniature Dutch oven that fits inside your basket.
This mimics the environment of a professional hearth oven by trapping steam, which is essential for developing a beautiful, crackly crust. Always check the dimensions of your air fryer to ensure your chosen mold or pot allows for at least an inch of space around the sides to facilitate proper airflow.
Mastering Yeast Activation and Proofing
The success of your bread depends heavily on the health of your leavening agent. Whether you are using dry yeast or baking powder, the yeast activation process must be handled with care. In a standard kitchen, ambient conditions are usually stable, but an air fryer environment is much more aggressive.
You should never try to proof your dough inside the air fryer unless your machine has a specific, low-temperature “proof” setting. The intense heat of a standard preheat cycle will kill the yeast before the bread has a chance to rise.
Instead, let your dough undergo its primary and secondary proofing in a warm, draft-free spot in your kitchen. Pay attention to the ambient humidity; if your kitchen is very dry, cover your bowl with a damp cloth to prevent a skin from forming on the dough. Once the dough has doubled in size and shows the right level of dough elasticity, it is ready for the basket.
Remember that the “rapid rise” associated with air frying can sometimes be a double-edged sword, causing the bread to expand too quickly before the structure has fully set. Patience during the proofing stage is your best defense against a dense or gummy crumb.
The Importance of Preheating and Temperature Control
One of the biggest mistakes beginners make is failing to preheat their appliance. Even though air fryers heat up quickly, a preheating period ensures that the heat circulation is uniform from the very first second.
If you put cold dough into a cold air fryer, the yeast might over-proof during the initial ramp-up phase, leading to a collapsed loaf. Set your appliance to the desired temperature and let it run for three to five minutes before inserting your baking tin.
When setting the temperature, keep in mind that air fryers are typically more efficient than traditional ovens. You should generally lower your target temperature by about 25 degrees Fahrenheit compared to a standard recipe. For example, if a recipe calls for 375°F, aim for 350°F in your air fryer.
This adjustment prevents the crust browning from happening too quickly, which would otherwise leave the center of the loaf raw or undercooked. Monitoring the internal temperature of your bread using an instant-read thermometer is the most reliable way to confirm it is fully baked; aim for an internal temperature of around 190°F to 200°F for most standard loaves.
Addressing Topical Gaps in Countertop Baking
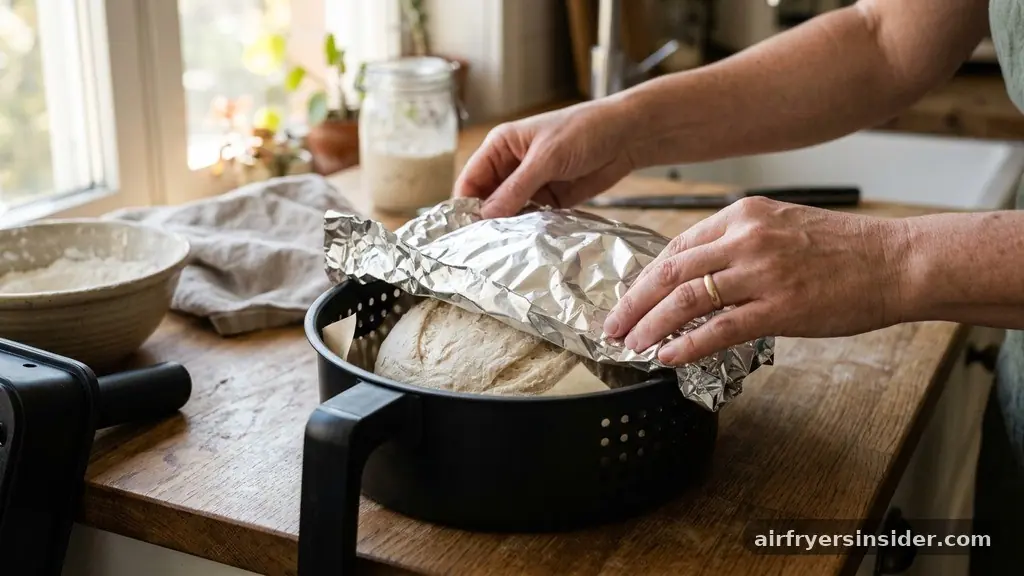
Many resources gloss over the specific challenges of air fryer air currents. A common issue is the “blow-away” effect, where the powerful fan causes the top of the dough to dry out or distort before it has a chance to rise.
To solve this, you can cover your loaf with a small piece of aluminum foil for the first half of the baking time. This protects the top of the bread and allows the interior to rise and set before the crust hardens.
Another gap in knowledge is the impact of dough hydration. High-hydration doughs (like ciabatta or wet sourdough) often struggle in air fryers because the intense airflow can create a leathery crust. If you are just starting out, stick to slightly lower-hydration recipes.
These are more forgiving and hold their shape better without the need for constant supervision. Finally, understand that the “crust thickness” is entirely in your control. If you prefer a softer, thinner crust, shorten the baking time and increase the temperature slightly to finish the process faster.
Common Troubleshooting Tips
- If the top is burning but the inside is doughy, cover the loaf with foil or drop the temperature by 20 degrees.
- If the bread is pale, you might be overcrowding the basket; ensure there is at least an inch of space for air to move.
- If your bread is flat, check your yeast; if it doesn’t foam in warm water, it’s inactive and will not provide a rise.
- For a better crust, lightly mist the top of the dough with water just before baking to encourage a crisp exterior.
The Science of the Maillard Reaction
The Maillard reaction is responsible for the deep, complex flavors and the beautiful golden-brown color of your bread crust. In an air fryer, this chemical reaction occurs rapidly due to the forced convection.
Because the air is constantly moving, moisture is stripped away from the surface of the dough much faster than in a conventional oven. This is a benefit if you love a crunchy crust, but it requires careful management.
To get the most out of this reaction, ensure the surface of your dough is slightly tacky before it goes into the basket. You can brush the top with a little water, milk, or even a light egg wash to provide the sugars and proteins necessary to fuel the reaction.
The ambient airflow will then take over, turning those sugars into a rich, caramelized layer. If you find that the color is developing too quickly, do not be afraid to reduce the fan speed if your specific model allows for it, or simply use the foil-tent method mentioned earlier to shield the surface from direct, intense heat.
Analyzing Baking Performance Metrics
When evaluating your results, it helps to look at the bread as a technical product. The crumb structure—the pattern of holes inside the bread—tells the story of your proofing and heat application. A tight, even crumb is usually the result of a gentle rise and steady heat.
Large, irregular holes suggest a vigorous fermentation. If your bread comes out with large tunnels or a dense, heavy base, it is likely that your baking tin was too deep or the air circulation was blocked by the position of the rack.
Comparison of Baking Environments
| Feature | Standard Oven | Air Fryer |
|---|---|---|
| Preheat Time | 15-20 Minutes | 3-5 Minutes |
| Heat Source | Radiant/Convection | Forced Convection |
| Crust Texture | Variable | Consistently Crispy |
| Capacity | High | Low/Single Loaf |
Adapting Traditional Recipes for Your Machine
You don’t need to hunt for “air fryer specific” recipes to get started. Most standard bread recipes, including those for white sandwich bread, dinner rolls, or even quick breads like banana bread, can be adapted with a few simple adjustments.
The primary change is the volume. If a recipe makes two large loaves, you will need to divide the dough into smaller portions that fit into your air fryer basket individually.
When adapting, reduce the baking time by about 30% to 50% as a starting point. Check the bread early and often. Because air fryers are so efficient, you can easily go from “perfectly golden” to “burnt” in the span of two minutes.
Keep a notebook of your adjustments, noting the temperature, time, and the type of pan used. This trial-and-error process is how you learn the unique personality of your appliance, as every brand has slightly different heating characteristics and airflow patterns.
Developing Your Own Signature Loaf
Once you have mastered the basics, you can start experimenting with inclusions like herbs, seeds, or dried fruits. The compact nature of an air fryer makes it ideal for testing small batches of experimental doughs. Because the energy cost is lower than running a large oven, you can afford to bake more frequently, which is the fastest way to improve your skills.
Consider the role of hydration again as you experiment. Adding seeds or grains can absorb moisture from the dough, so you may need to increase your liquid slightly to maintain the desired dough elasticity.
As you refine your process, you will find that the air fryer is not just a convenience tool but a legitimate way to bake high-quality bread on demand. Whether it is a fresh roll for dinner or a small loaf for breakfast, the ability to produce these items quickly and efficiently transforms your daily routine.
Frequently Asked Questions
Is an air fryer good for baking bread?
Yes, an air fryer is excellent for baking bread, especially for smaller batches or quick breads. Its high-speed fan and compact size create a perfect environment for a crispy crust and a well-risen interior, provided you use the correct temperature and monitor the baking time closely.
What are the most common mistakes when air frying bread?
The most common mistakes are failing to preheat the unit, not using a suitable baking tin, and baking at a temperature that is too high. These errors often result in a burnt exterior with an undercooked, doughy center. Always use a thermometer to check for doneness.
Can you bake bread without yeast in an air fryer?
Absolutely. You can make quick breads, soda breads, or flatbreads using baking powder or baking soda as leavening agents. These recipes are often easier for beginners because they do not require a long proofing time and are less sensitive to the intense airflow of the air fryer.
How do I prevent the bread from drying out?
To prevent the bread from drying out, ensure your dough has the right hydration level and consider covering the top with foil during the first half of the bake. You can also place a small, heat-safe dish with a little water in the basket to create steam.
Conclusion
Learning to bake in your countertop appliance opens up a world of fresh, warm bread without the need to heat up your entire kitchen. By respecting the power of the fan and adjusting your temperatures, you can produce consistent, delicious results that will impress anyone at your table. Remember to start with smaller, simpler recipes as you gain confidence and familiarity with your specific model’s heat distribution.
The journey to becoming a proficient baker in this way is all about consistency and observation. Don’t be discouraged by a loaf that isn’t perfect on your first try; even minor tweaks to your baking time or the placement of your tin can lead to significant improvements.
Grab some flour, yeast, and your favorite recipe, and start experimenting today. You will soon find that the answer to whether you can make bread in an air fryer is a resounding yes, and it might just become your favorite way to bake.
Meta Description: Discover if you can make bread in an air fryer with our expert guide. Learn tips for perfect crust, crumb structure, and mastering baking convection.


