

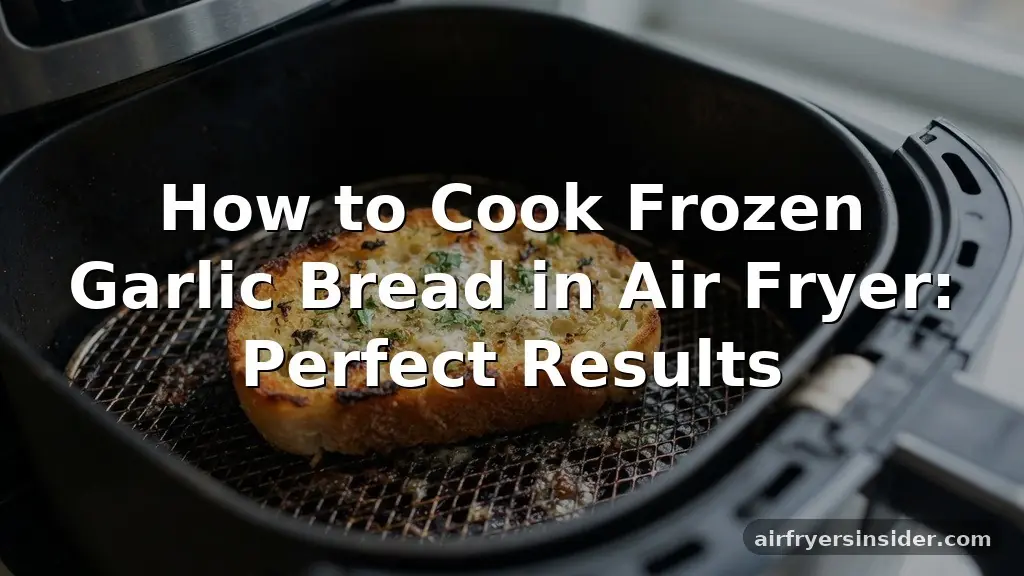
Cooking frozen garlic bread in an air fryer is one of the most efficient ways to transform a simple freezer staple into a restaurant-quality side dish. If you have ever struggled with soggy crusts or unevenly melted toppings when using a conventional oven, you will find that the intense convection cooking environment of an air fryer offers a superior alternative. By mastering the right settings and technique, you can achieve that perfect balance of a crunchy exterior and a soft, flavorful center in a fraction of the time it takes to preheat a standard range.
Getting the best results starts with understanding how your specific machine handles airflow. Because air fryers work by circulating hot air at high speeds, they excel at creating crispy edges that make garlic bread truly craveable. Whether you are working with thick slices of Texas toast or a long, crusty baguette, the process remains remarkably consistent once you account for the size and thickness of your bread.
Understanding the Mechanics of Air Frying Bread
The primary reason to use an air fryer for this task is the sheer efficiency of heat circulation. Unlike a toaster oven, which relies on radiant heat from heating elements, an air fryer uses a powerful fan to drive hot air directly against the surface of the food.
When dealing with frozen food, this is particularly beneficial because it helps thaw the center while simultaneously browning the exterior. You are effectively dehydrating the surface just enough to create a delightful crunch while the garlic butter inside melts into the crumb of the bread.
Managing the cooking temperature is critical because bread has a tendency to go from perfectly toasted to burnt in a matter of seconds. Most users find that a moderate temperature, typically between 320°F and 350°F, provides the best results. If you set the temperature too high, the exterior will char before the middle has a chance to warm up.
If it is too low, the bread may dry out and become tough rather than crispy. Finding that middle ground ensures the butter remains rich and flavorful rather than evaporating away.
The Importance of Preheating and Preparation
While many modern air fryers claim they do not need to be preheated, taking the extra three minutes to warm the unit can significantly improve your results. Preheating creates a stable environment where the cooking process begins the moment the bread hits the air fryer basket. This consistency is vital when working with frozen items, as it prevents the bread from spending extra time in a lukewarm chamber that might cause the butter to leak out onto the floor of the basket before the crust has set.
Arrangement also plays a major role in how your bread turns out. You should never stack slices on top of each other, as this blocks the airflow and results in uneven cooking. If your air fryer basket is small, it is better to cook in batches than to crowd the space.
Ideally, the slices should be arranged in a single layer with enough room for air to move between them. If you are using parchment paper to make cleanup easier, ensure that you do not cover the entire bottom of the basket, as this can disrupt the internal airflow and lead to soggy bottoms.
Adapting for Different Types of Garlic Bread
Not all garlic breads are created equal. A thick, pre-buttered slice of Texas toast requires a different approach than a thin, crispy baguette or a pull-apart loaf. Thick slices have more mass, meaning they hold onto the cold of the freezer longer.
You may need to increase the cooking time by a minute or two compared to thinner, pre-sliced varieties. It is always wise to keep a close eye on the progress after the halfway point, as the density of the bread will dictate how quickly it absorbs the heat.
If you are cooking a full-length baguette, you might need to cut it into smaller sections to fit inside your specific model, such as a Ninja Foodi or a Cosori. Cutting the bread does not just help with space; it actually improves the final texture.
By exposing more of the interior to the circulating air, you increase the surface area that can become golden brown. This technique is particularly effective if you prefer your garlic bread to have a substantial, crunchy crust that holds up well against saucy pasta dishes or soups.
| Bread Type | Temp Setting | Approximate Time |
|---|---|---|
| Texas Toast (Frozen) | 350°F | 4-6 Minutes |
| Baguette Slices | 330°F | 3-5 Minutes |
| Pull-Apart Loaf | 320°F | 7-9 Minutes |
Managing Butter and Toppings
One common challenge when cooking garlic bread in an air fryer is the tendency for the garlic butter to melt and drip through the grate of the basket. This is not just a cleaning nuisance; it is a loss of flavor.
If you find your bread is losing too much butter, you can place a small piece of aluminum foil directly under each slice, but be careful not to create a large sheet that blocks the vents. This acts as a reservoir to catch the butter, allowing the bottom of the bread to essentially toast in the flavorful fat.
If you like to add extra cheese or herbs, wait until the final minute of cooking to apply them. Because these toppings are often delicate, they can burn quickly under the intense fan.
Adding shredded mozzarella or parmesan in the last 60 seconds allows the cheese to melt perfectly without turning into a blackened crisp. This timing is essential for maintaining the bread texture you expect, ensuring that the cheese acts as a creamy, savory layer on top of a perfectly toasted base.
Addressing Topical Gaps: Troubleshooting Common Issues
Many users wonder if they can cook garlic bread from frozen without thawing it first. The answer is a resounding yes. In fact, thawing is generally discouraged because it can make the bread mushy before it even reaches the heat.
The air fryer is specifically designed to handle frozen food, and the direct heat will seal the exterior quickly, preventing the moisture from turning the bread into a soggy mess. If your bread feels slightly damp after cooking, it is likely due to overcrowding or a temperature that was set too low to drive off the excess moisture.
Another frequent question involves the use of accessories. Can you use silicone liners or racks? While these are convenient, they can sometimes impede the heat circulation that makes air frying so effective.
If you use a silicone liner, you might find that you need to extend the cooking time by a minute or two. Always check your manufacturer’s guidelines regarding the maximum temperature for any accessories you place inside your kitchen appliances, as some materials are not designed to withstand the high-intensity heat generated by the air frying process.
Safety and Internal Temperature Considerations
While bread does not have the same strict food safety requirements as raw meat, you still want to ensure the center is heated through. The internal temperature of the bread should be hot enough to melt the butter completely.
If you find that the edges are burning but the center remains cold, your temperature is too high. Lower the heat and increase the time to allow the heat to penetrate the core of the bread more gently.
Be mindful of the smoke point of the butter or oil used on the bread. If your garlic bread is heavily coated in butter, the drippings at the bottom of the air fryer can start to smoke if they get too hot.
If you notice smoke, it is a sign that you should clean the basket or reduce the temperature. Keeping your equipment clean is a fundamental part of successful air frying, as built-up grease from previous meals can affect the flavor of your bread and create unnecessary smoke during the cooking process.
Achieving the Perfect Golden Brown Finish
The visual cue of a golden brown surface is the best indicator that your garlic bread is ready. Because air fryers vary in wattage and fan strength, your specific model might cook slightly faster or slower than a neighbor’s. The first time you cook a new brand of frozen bread, check it at the four-minute mark.
This gives you a baseline for how your unit performs. If it looks pale, give it another minute, but check again frequently.
If you prefer an extra-crispy finish, you can lightly mist the bread with a tiny amount of olive oil before cooking, though most frozen brands already contain enough fat to brown on their own. The secret to the best crispiness is often just the final 30 seconds.
If the bread is cooked through but not quite as dark as you like, turn the heat up to the maximum setting for just a short burst. This “finishing” step works wonders for achieving that deep, toasted color that makes the bread look like it came straight from a bakery.
Reheating Leftover Garlic Bread
If you have leftover bread, the air fryer is vastly superior to the microwave for reheating. Microwaves tend to make bread rubbery or tough once it cools down.
By placing your leftover slices back into the air fryer at a lower temperature, around 300°F, you can revive the texture in about two minutes. The air circulation will evaporate the excess moisture that accumulated while the bread was sitting, returning the crust to its original state.
When reheating, treat the bread as if it were a fresh, room-temperature item rather than a frozen one. The cooking time will be significantly shorter. Keep a close eye on the slices, as they can dry out if left in for too long.
If the bread seems a bit dry, a tiny brush of melted butter or a light spray of oil can help restore its richness. This method ensures that you never have to waste good garlic bread, allowing you to enjoy it just as much the second time around.
The Role of Air Fryer Settings in Texture
Every air fryer has a unique personality. Some models, especially those with a basket-style design, tend to be more aggressive with their fan speed. Others, like convection-style oven air fryers, provide a gentler, more even heat.
Knowing how your specific machine functions is key to mastering the bread texture. If your unit runs hot, you will naturally need to adjust your settings downward to prevent the garlic butter from burning before the bread is toasted.
Experimenting with the rack position is another way to control the final result. In basket units, your bread is usually very close to the heating element, which is great for browning but requires more vigilance.
If you have an adjustable tray, moving the bread further from the element can yield a more uniform toast, which is ideal if you are cooking thicker pieces. Don’t be afraid to pull the basket out and rotate the slices halfway through; this simple action often compensates for the “hot spots” that exist in almost every air fryer.
Frequently Asked Questions
How long for frozen garlic bread in the air fryer?
Most frozen garlic bread slices require between 4 to 6 minutes at 350°F. Always check the bread after 4 minutes, as the size and thickness of the slices, along with the specific wattage of your air fryer, will influence the exact cooking time needed for perfect results.
Do I need to defrost the bread before air frying?
No, you should not defrost the bread. Cooking it directly from frozen is the most effective way to ensure the center warms up while the exterior achieves a crispy, golden-brown texture. Thawing beforehand often leads to a soggy, undesirable consistency that ruins the quality of the bread.
Why is my garlic bread burning on the outside?
If your bread is burning on the outside but cold in the middle, your cooking temperature is likely too high. Try reducing the heat by 25 degrees and extending the cooking time by a minute or two to allow the heat to penetrate the center without charring the surface.
Can I put foil in the air fryer to catch the butter?
Yes, you can use a small piece of aluminum foil to catch melting butter, but ensure it does not cover the entire bottom of the basket. Blocking the airflow prevents proper circulation, which is essential for the even toasting and crispiness that makes air-fried garlic bread so delicious.
Conclusion
Mastering the art of cooking frozen garlic bread in an air fryer is a simple way to elevate your weeknight meals. By focusing on consistent temperature management, proper spacing in the basket, and knowing when to pull the bread out for that ideal golden finish, you ensure a high-quality side dish every time. Whether you prefer a quick, crispy snack or a golden-brown accompaniment to a hearty dinner, the air fryer provides the perfect environment to get it right.
Start with these fundamental techniques, adjust based on your specific appliance, and enjoy the convenience of perfectly toasted bread whenever the craving strikes. Feel free to experiment with your own timing and favorite toppings to make this staple your own.
Meta Description: Learn exactly how to cook frozen garlic bread in air fryer for perfect, crispy results. Discover tips on temperatures, timing, and avoiding soggy bread.


