

Learning how to cook tri tip in air fryer setups allows you to achieve a steakhouse-quality finish without standing over a hot grill. This cut of beef, known for its triangular shape and rich marbling, responds exceptionally well to the intense, concentrated convection heat found in modern air fryers.
By mastering the balance between a flavorful crust and a tender, juicy center, you can transform this versatile roast into a weeknight staple. Whether you are aiming for a perfect medium-rare or a slightly more done interior, the air fryer offers consistent results that are hard to replicate with traditional oven roasting.
Understanding the Tri Tip Cut
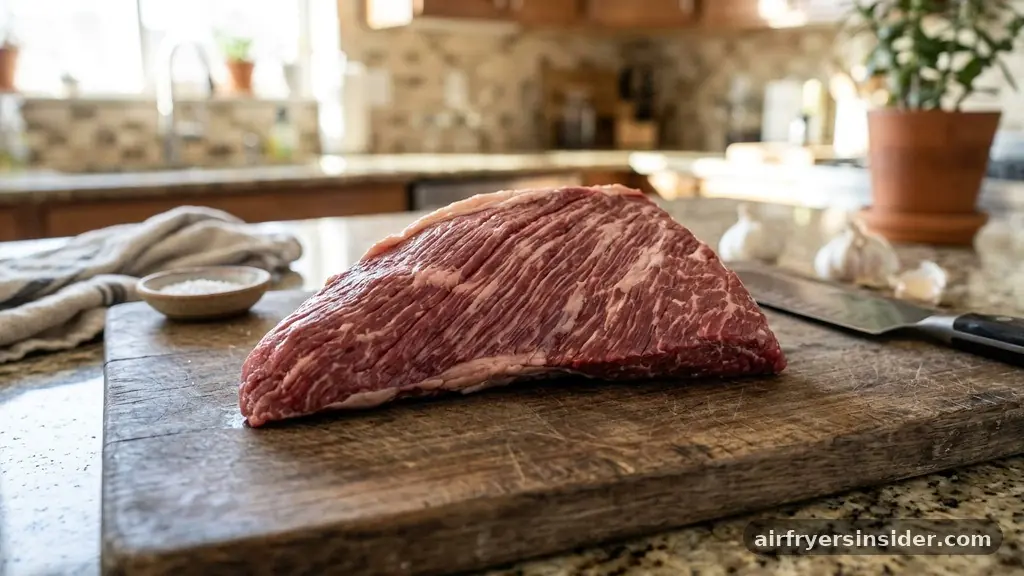
The tri tip is a triangular muscle located at the bottom of the sirloin. Historically popular in California, this cut has gained national recognition for its incredible flavor profile and relatively lean texture.
It is often referred to as a bottom sirloin roast or a Santa Maria steak. Because it lacks the heavy connective tissue found in tougher cuts like brisket or chuck, it is best prepared using high-heat methods that develop a deep, savory exterior while keeping the center succulent.
When you prepare this beef roast, you are dealing with a muscle that has a distinct grain. Recognizing how the protein fibers run is critical for the final texture of the meat. Before you even think about the heat, consider the fat cap.
Some butchers trim it off completely, while others leave a thin layer. This fat helps baste the meat during the cooking process, adding moisture and richness that balances the lean muscle. If your roast has a thick, uneven fat cap, trim it down to about an eighth of an inch to ensure it renders properly without becoming chewy or unappealing.
Preparing Your Beef for Success
Preparation is the secret to a professional result. Start by taking your meat out of the refrigerator about 30 to 45 minutes before you plan to start cooking. Allowing the beef to reach room temperature ensures more even heat distribution throughout the cooking time.
While the beef rests on the counter, pat the entire surface dry with paper towels. Moisture is the enemy of a good crust. If the surface is damp, the air fryer will steam the meat rather than brown it, preventing the development of that delicious, dark outer layer.
Once the surface is dry, apply a high-quality dry rub. A simple, classic combination of kosher salt, coarse black pepper, garlic powder, and onion powder works wonders. The salt draws out just enough moisture to create a brine on the surface, while the garlic and onion powders toast during the air frying process, creating a savory, aromatic coating.
If you want to experiment, you can add smoked paprika or dried herbs like rosemary or thyme to the mix. Rub a light coating of olive oil over the meat first; this acts as a binder for the spices and helps conduct the intense heat of the air fryer directly to the surface of the roast.
Mastering the Air Fryer Environment
The primary advantage of using an air fryer is its powerful convection heat. Unlike a standard oven, which relies on radiant heat, the air fryer circulates superheated air rapidly around the food.
This mechanism is ideal for creating the Maillard reaction, the chemical process that gives seared meat its complex, browned flavor. If you are using a device like a Ninja Foodi or a similar countertop convection appliance, you must treat it as a miniature, high-powered convection oven.
Preheating is not always mandatory in every air fryer model, but for high-quality proteins like beef, it is a game-changer. Allowing the basket or inner chamber to reach the target temperature ensures that the searing process begins the moment the meat touches the rack.
If you skip preheating, the meat will slowly warm up, potentially leading to an overcooked gray band around the edges before the center reaches your desired doneness. Aim for a temperature setting between 375 and 400 degrees Fahrenheit to get that balance of a crispy exterior and a tender interior.
Determining the Ideal Cooking Time
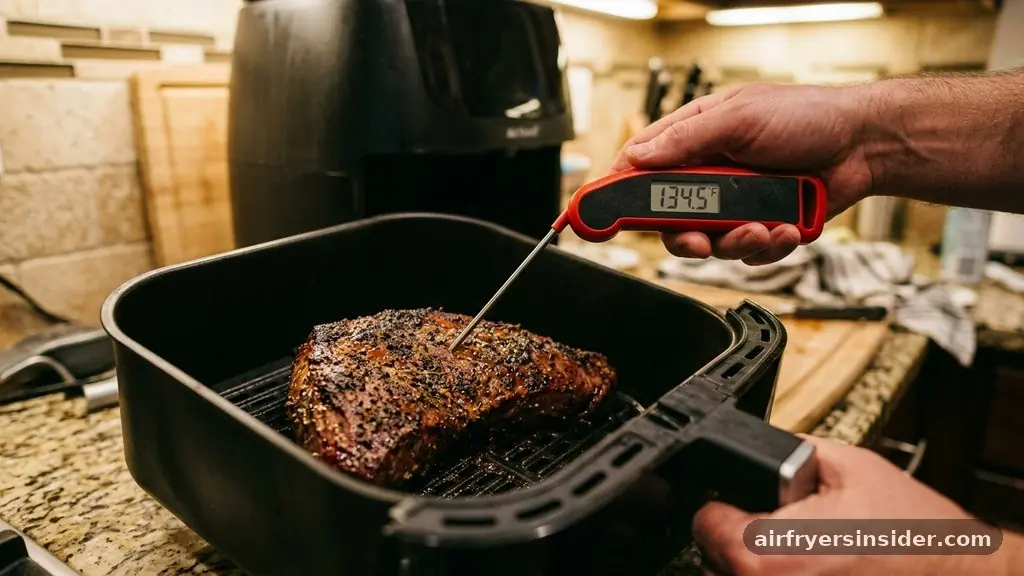
Cooking time varies significantly based on the size of your roast and the specific model of your air fryer. A smaller two-pound roast will cook much faster than a three-pound piece.
You should always rely on a meat thermometer rather than a timer alone to guarantee safety and precision. The following table provides a general guideline for reaching specific levels of doneness, but these are estimates rather than hard rules.
| Desired Doneness | Internal Temperature | Approximate Cooking Time (per lb) |
|---|---|---|
| Rare | 120°F – 125°F | 10 – 12 minutes |
| Medium-Rare | 130°F – 135°F | 13 – 15 minutes |
| Medium | 140°F – 145°F | 16 – 18 minutes |
Remember that carryover cooking will cause the internal temperature to rise by about 5 to 10 degrees after you remove the roast from the heat. If you pull the beef at 125°F, it will likely settle around 130°F to 135°F as it sits, which is the sweet spot for a perfect medium-rare. Always insert your thermometer into the thickest part of the roast to get an accurate reading, avoiding any bones or large pockets of fat that might skew the measurement.
The Importance of the Resting Period
Never skip the resting period. It is tempting to slice into a beautiful, crusty piece of beef immediately, but doing so will cause the precious juices to run out onto your cutting board.
Resting allows the protein fibers to relax and reabsorb the moisture that was pushed toward the center of the roast during the cooking process. A loosely covered foil tent is the best way to maintain the heat while the meat rests.
Let the tri tip sit for at least 10 to 15 minutes. This small investment in time ensures that every single bite is as tender and flavorful as possible. During this time, the carryover cooking finishes the process, bringing the center to the exact temperature you want.
If you slice too early, you lose that structural integrity of the meat, and the resulting texture will be significantly drier and less satisfying. Use this time to prepare side dishes or clean up your workspace.
Slicing Against the Grain
Slicing is the final step in the process, and it is just as important as the heat application. Because the tri tip muscle fibers run in different directions, you must pay close attention before you start cutting.
If you slice with the grain, you will end up with long, chewy strands that are difficult to eat. If you slice against the grain, you shorten those fibers, making the meat feel melt-in-your-mouth tender.
Look at the roast before you cook it to identify the direction of the grain. Sometimes it helps to make a small notch in the meat before cooking so you can easily identify the direction after it has developed a dark crust.
When you are ready to serve, place the roast on a cutting board and slice it into thin, even strips. If you have a particularly large roast, you might find that the grain direction changes halfway through; adjust your knife angle accordingly to ensure every slice is cut perpendicular to those tough muscle fibers.
Addressing Common Cooking Gaps
Many home cooks struggle with achieving a uniform cook on a tri tip because the roast is naturally tapered. The thinner end will inevitably cook faster than the thicker end.
To address this, some chefs tuck the thinner tail end under itself or use a small piece of foil to shield it from the direct fan for the first few minutes of cooking. This technique helps ensure that the entire roast reaches the desired internal temperature at roughly the same time.
Another common gap involves the use of air fryer accessories. Many people worry that the rack in the air fryer will leave unsightly marks or that the air flow will be restricted. If your unit comes with a crisper plate, ensure it is clean and properly seated.
If you are concerned about smoke, keep an eye on the fat drippings at the bottom of the basket. If you are cooking at high temperatures, a small amount of water or a slice of bread at the bottom of the pan can help catch drippings and prevent them from burning, which keeps your kitchen smoke-free while you work.
Essential Tips for Consistent Results
- Always use a calibrated meat thermometer to follow food safety guidelines and avoid guessing.
- If you prefer a deeper crust, you can sear the meat in a cast-iron skillet for 60 seconds per side before placing it in the air fryer.
- Avoid overcrowding the air fryer basket; if you have a massive tri tip, ensure there is at least an inch of space around the meat for air to circulate.
- Experiment with different rubs; brown sugar works well if you enjoy a slightly caramelized, sweet-and-savory profile.
- If you have leftovers, store them in an airtight container and slice them thin for sandwiches or salads the following day.
- Check the manufacturer’s manual for your specific air fryer; some models run hotter than others, so the first time you cook a roast, check the internal temp a few minutes early.
Consistent results come from understanding your specific equipment. If you notice that your air fryer consistently cooks faster than the times listed in recipes, adjust your expectations and start checking the temperature five minutes before the suggested window. The goal is to reach that perfect internal temperature without drying out the exterior, and with a bit of practice, you will find the rhythm that works best for your specific kitchen setup.
Frequently Asked Questions
How long do you cook a tri tip in the air fryer for medium-rare?
For a standard-sized tri tip weighing about two to three pounds, cooking at 400°F usually takes between 15 and 20 minutes. The key is to use a meat thermometer to pull the beef when the center hits 130°F, allowing for a slight rise during the resting phase.
Is it better to cook tri tip in the air fryer or on a grill?
Both methods have merits. A grill provides a smoky, charred flavor that is classic for this cut, while the air fryer offers superior convenience and precise temperature control. The air fryer is often the better choice for smaller roasts or when you want a quick, consistent, and mess-free dinner.
Do I need to flip the tri tip while it is in the air fryer?
While not strictly required due to the circulating air, flipping the roast halfway through the cooking time can help ensure more even browning on all sides. If your air fryer has a powerful top-down element, flipping ensures the bottom of the roast develops a nice crust as well.
Can I cook a frozen tri tip in the air fryer?
It is not recommended to cook a frozen roast directly in the air fryer. The exterior will likely overcook or burn before the center reaches a safe temperature. Always thaw your beef completely in the refrigerator overnight to ensure even cooking and better texture throughout the entire cut.
The beauty of preparing beef this way lies in the combination of convenience and quality. By following these steps—from proper seasoning and temperature monitoring to the vital resting and slicing techniques—you can elevate a simple cut of meat into a centerpiece-worthy meal. Whether you are hosting a small dinner or just looking for a reliable way to prepare protein for the week, the air fryer is a reliable tool that delivers consistent, delicious results.
Now that you have the knowledge to handle the timing and the technique, you are ready to experiment with your favorite spice blends and sides. Enjoy the process of crafting a perfect meal, and don’t hesitate to adjust the variables to suit your specific taste preferences and equipment capabilities.
How to cook tri tip in air fryer setups effectively involves monitoring the internal temperature closely to ensure a juicy, tender result every time.


