


Learning how to dehydrate oranges in air fryer units transforms a simple piece of citrus fruit into a versatile ingredient for everything from festive holiday ornaments to elegant cocktail garnishes. While many people associate this process with specialized dehydrator machines, your kitchen’s convection-based air fryer is often more efficient at achieving that perfect, dried-out finish.
By mastering the balance of low heat and steady airflow, you can create professional-looking slices that retain their vibrant color and aromatic zest. This guide walks you through the essential techniques for effective moisture removal, ensuring your fruit turns out crisp, beautiful, and ready for whatever project you have in mind.
Selecting and Preparing Your Citrus Fruit
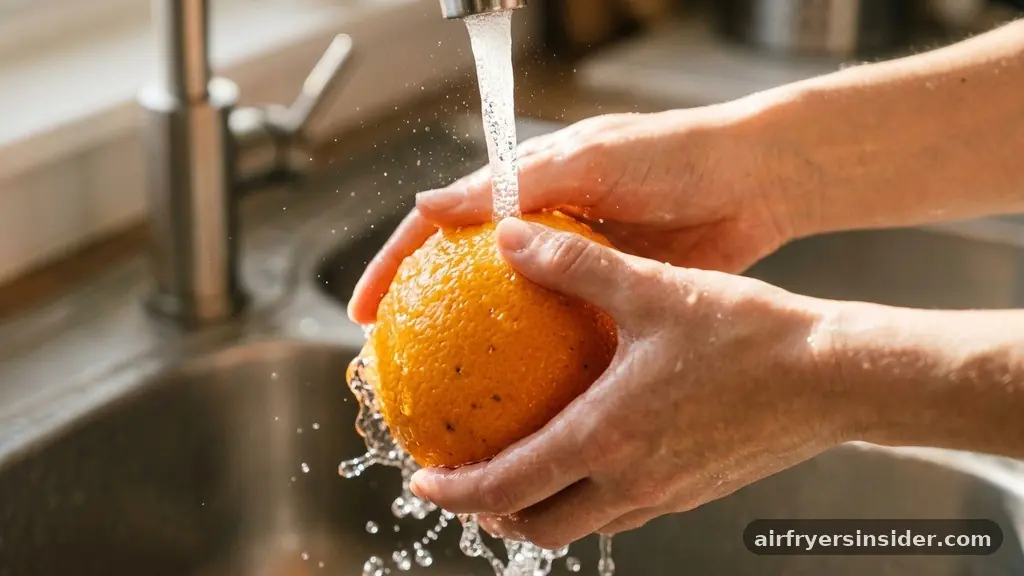
Choosing the right oranges is the most critical step in the dehydration process. You want firm, blemish-free fruit with a bright, taut skin. Navel oranges are excellent candidates because they are seedless and have a consistent shape, which makes getting uniform slices much easier.
Avoid fruit that feels soft or has visible bruising, as these imperfections will become more pronounced once the moisture is removed. Before you begin slicing, wash the oranges thoroughly under cool running water to remove any wax or surface residue. Even if you aren’t eating the peel, it’s good practice to ensure the outside is perfectly clean.
Once your oranges are clean, drying them completely with a paper towel is vital. Excess water on the surface can lead to uneven drying times or even unwanted browning during the initial stages. A sharp knife is non-negotiable here; if your knife skills aren’t quite up to par, a mandoline slicer is a fantastic tool to ensure your slices are perfectly even.
Consistency is the secret to success because slices of varying thicknesses will dry at different rates, leading to a mix of burnt edges and soft, under-dried centers. Aim for slices about an eighth of an inch thick for the best results.
Achieving Precision with a Mandoline Slicer
If you want your dried orange slices to look like they came from a high-end boutique, a mandoline slicer is your best friend. This tool allows for the creation of thin uniform slices that are nearly impossible to achieve with a standard chef’s knife.
When using a mandoline, always prioritize safety by using the provided guard or a cut-resistant glove. Because oranges are juicy, they can be slippery, and the guard helps maintain a steady grip as you pass the fruit over the blade.
The goal is to produce slices that are thin enough to let light pass through them when held up, which creates that beautiful stained-glass effect often desired for holiday ornaments. If the slices are too thick, they will retain moisture in the center, which can lead to mold growth if stored improperly. Conversely, slices that are too thin might shrivel and lose their structural integrity too quickly.
Start by cutting off the very ends of the orange, then proceed to slice the body into rounds. Keep the slices consistent, as this ensures your air fryer can handle the entire batch at the same rate.
Setting Up Your Air Fryer for Dehydration
Most modern air fryers operate by using a powerful convection fan to circulate hot air, which is the exact mechanism needed for drying fruit. However, you must avoid the high temperatures typically used for cooking crispy chicken or fries. Instead, you need to use the lowest possible temperature setting available on your machine.
Most air fryers can be set as low as 160°F or 180°F. If your model doesn’t have a dedicated dehydrate function, simply set the temperature to its lowest point and keep a close eye on the progress.
To prepare the interior, ensure your basket is clean and free of any leftover grease from previous meals, as citrus can absorb odors easily. While you don’t always need to line the basket, using a piece of parchment paper cut to fit the bottom can prevent smaller slices from falling through the grate or sticking to the metal.
If you have rack accessories, these are incredibly useful because they increase the surface area, allowing you to dehydrate more slices at once without stacking them. Proper air circulation is the key to uniform moisture removal; if the air cannot flow freely around each slice, the drying process will stall.
Managing the Dehydration Process
The dehydration process is a slow game that requires patience. Once your slices are arranged in the air fryer, you will likely need to flip them halfway through the cycle to ensure even drying on both sides.
Because the convection fan is so efficient, you might find that the air fryer finishes the job in a fraction of the time a traditional dehydrator would take. Typically, this process takes anywhere from two to four hours depending on the thickness of your slices and the specific airflow of your air fryer.
Throughout this time, monitor the slices for signs of browning. If you notice the edges starting to darken too quickly, it is a sign that the temperature is too high. You might need to adjust your settings or move the rack further away from the heating element if possible.
Remember that the citrus peel contains oils that can become bitter if they are scorched. The ideal dried orange should have a crisp texture and a slightly darkened, translucent appearance. If you press on the center of a slice and it still feels spongy or damp, it needs more time.
Understanding the Role of the Bitter Pith
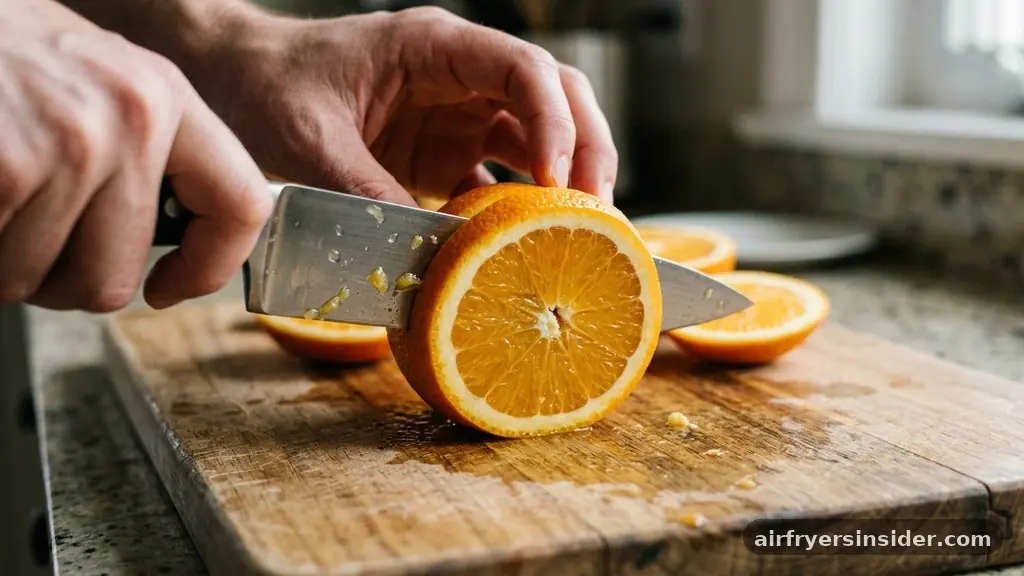
Many beginners worry about the white layer beneath the orange skin, known as the bitter pith. While this part of the fruit is indeed more bitter than the flesh or the zest, it is a natural part of the dehydration process.
If you are using the oranges for potpourri or festive decorations, the pith adds a beautiful textural contrast to the deep orange color of the fruit. For culinary uses, such as cocktail garnishes or cake decorations, the bitterness is actually tempered by the concentrated sweetness of the dried fruit.
If you find the bitterness overwhelming, you can try to slice the oranges slightly thinner to reduce the amount of pith in each round, though this is difficult to do perfectly. Another trick is to lightly dust the slices with a tiny amount of sugar or a spice like cinnamon before dehydrating.
This can help mask the intensity of the pith while adding a sophisticated flavor profile. Ultimately, the goal is to create a balanced result where the vibrant color and scent of the orange take center stage over any lingering sharpness.
Comparing Dehydration Methods
Choosing the right equipment for drying fruit can be confusing. The table below outlines how the air fryer compares to other common kitchen appliances to help you decide which is best for your specific needs.
| Method | Time Required | Texture Outcome | Energy Efficiency |
|---|---|---|---|
| Air Fryer | 2–4 Hours | Crisp & Uniform | High |
| Food Dehydrator | 8–12 Hours | Very Consistent | Medium |
| Oven | 4–6 Hours | Variable | Low |
As shown, the air fryer is significantly faster than a dedicated dehydrator, largely due to the intense, focused airflow of the convection fan. While a dehydrator is superior for large batches, the air fryer is the clear winner for small, quick projects like making a handful of garnishes for a dinner party or a few ornaments for a small tree.
Food Safety and Storage Best Practices
Proper storage is the final step in ensuring your hard work doesn’t go to waste. Once the oranges are fully dehydrated, remove them from the air fryer and let them cool completely on a wire rack.
Any residual heat left in the slices can create condensation inside a storage container, which will lead to spoilage. Once cool, they should be stored in an airtight container in a cool, dry place away from direct sunlight.
To extend the shelf life even further, consider using silica gel packets inside your container. These help absorb any remaining microscopic moisture, keeping the slices crisp for months.
If you notice any signs of moisture, such as the slices becoming soft or sticking together, they were likely not dried thoroughly enough and should be returned to the air fryer for another thirty minutes. Properly dried oranges can last for several months, making them a great pantry staple to have on hand for unexpected guests or last-minute baking projects.
Creative Uses for Your Dried Oranges
Once you have mastered the technique, the ways to use your dried citrus are limited only by your imagination. Dried orange slices are a classic addition to holiday ornaments, where they can be strung onto twine with cinnamon sticks and star anise to create a natural, fragrant garland.
They also serve as a sophisticated garnish for cocktails, adding a touch of elegance to an Old Fashioned or a gin-based drink. The citrus peel provides a subtle aroma that enhances the drinking experience without needing a fresh fruit wedge.
Beyond decor and drinks, consider these culinary applications:
- Grate the dried slices into a fine powder to create a concentrated orange zest seasoning for baked goods.
- Use them as a topping for yogurt bowls or oatmeal to add a chewy, sweet-tart texture.
- Include them in homemade potpourri blends for a natural, seasonal scent in your home.
- Dip half of the dried slice in melted dark chocolate for a simple yet elegant dessert.
- Add them to jars of loose-leaf tea for a natural infusion of citrus flavor.
Addressing Common Troubleshooting Issues
Even with the best preparation, you might run into a few hurdles. One common issue is uneven drying, which usually happens when the slices are placed too close together.
Ensure there is plenty of space for air to circulate around every single piece; if the basket is overcrowded, the air cannot reach the center of the slices effectively. If you feel like your air fryer is drying the top layer too fast while the bottom stays damp, try to limit your batch size or rearrange the slices midway through the process.
Another issue is the browning or caramelization of the fruit sugars. While a little bit of golden color is desirable, dark brown or blackened edges indicate that the heat is too high. If you cannot lower your air fryer temperature further, try placing a piece of parchment paper over the top of the fruit to act as a shield against the direct heat of the fan.
This simple hack can save a batch of oranges from burning while still allowing the moisture to escape. Remember that practice makes perfect, and your first batch might just be a learning experience before you perfect your timing and temperature settings.
Frequently Asked Questions
How long does it take to dehydrate oranges in an air fryer?
Most air fryers will dehydrate orange slices in two to four hours. The exact time depends on the thickness of the slices and your appliance’s specific airflow. Always check your slices periodically after the two-hour mark to ensure they don’t over-dry or burn.
Is it necessary to use a special rack for dehydrating fruit?
While not strictly necessary, using rack accessories is highly recommended. These racks increase the available surface area in your air fryer basket, allowing for better air circulation and enabling you to dry more slices at once without them touching or overlapping.
What is the best way to tell if the orange slices are finished?
The slices are finished when they feel firm and have a crisp texture throughout. If you press the center of a slice and it feels flexible or damp, it needs more time. They should look slightly translucent and have no remaining moisture.
Can I dehydrate other types of citrus alongside the oranges?
Yes, you can certainly dehydrate lemons, limes, or grapefruits at the same time as oranges. Just ensure that all slices are cut to a similar thickness so they dehydrate at a consistent rate. Keep in mind that different fruits have different sugar contents and may brown at different speeds.
Final Thoughts
Learning how to dehydrate oranges in air fryer units is a rewarding skill that bridges the gap between home cooking and creative crafting. By focusing on consistent slice thickness and maintaining low, steady temperatures, you can produce beautiful, shelf-stable citrus that enhances everything from your home decor to your favorite cocktail recipes. The process is straightforward, requiring only a few simple tools and a bit of patience, but the results offer a level of quality and customization that store-bought alternatives simply cannot match.
Start with a single orange to get a feel for your appliance’s unique heating characteristics, and soon you will find yourself incorporating these vibrant, aromatic slices into your daily life. Experiment with different varieties and enjoy the process of perfecting your own batch of dried fruit.


