
Mastering the art of cooking chicken breast tenderloins in air fryer setups provides a reliable way to get dinner on the table without the mess of deep frying. Because these smaller cuts of poultry are naturally tender, they transition perfectly to the high-intensity heat of an air fryer, resulting in a juicy interior and a satisfying exterior crunch.
Whether you are looking for a quick weeknight protein or a snack to pair with your favorite dipping sauces, this method delivers consistent results every time. Learning the right temperature and timing will ensure you avoid dry, overcooked meat while keeping your kitchen cool and clean.
Understanding the Mechanics of Air Frying Chicken
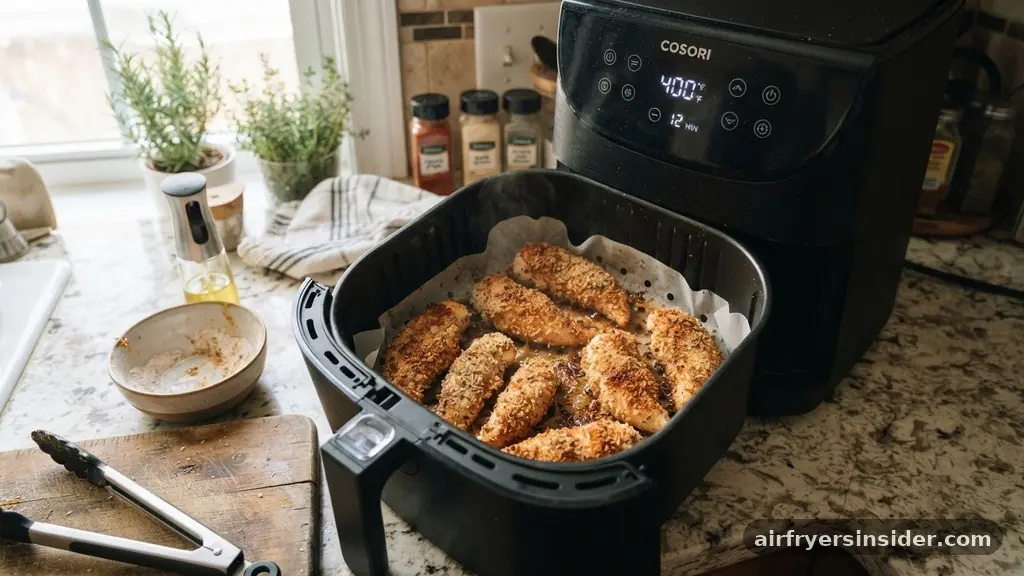
The primary appeal of using an air fryer for poultry lies in its ability to mimic deep frying using little more than hot air. Most modern appliances, such as a Ninja Foodi or a Cosori, utilize a powerful fan to facilitate rapid air circulation around the food.
This convection effect ensures that the heat hits every surface of the chicken breast tenderloins simultaneously, which is why you get that signature golden brown finish. Unlike a standard oven, which can take a long time to reach temperature, the compact chamber of an air fryer allows for instant heat transfer.
When you place your food inside the basket, the hot air pulls moisture away from the surface while sealing the juices inside the meat. This process is particularly effective for tenderloins, which are thin and cook much faster than whole chicken breasts.
Because the surface area of a tenderloin is large relative to its thickness, it develops a crispy coating quite efficiently. Understanding that the air fryer is essentially a high-powered convection oven helps you adjust your expectations and settings to achieve professional-quality textures without needing to submerge your dinner in hot oil.
Preparing Your Chicken for Optimal Results
Before you even think about turning on the machine, proper preparation of the protein is essential. You should start by patting the chicken breast tenderloins completely dry with paper towels. Excess moisture on the surface of the meat will create steam instead of a crust, leading to soggy results rather than the crunch you crave.
Once the chicken is dry, apply a light coating of olive oil or a high-smoke-point cooking spray. This fat helps the heat conduct evenly and ensures that your seasoning blend adheres to the meat effectively.
Dredging your chicken is another step that significantly impacts the final texture. If you prefer a breaded style, you can dip the tenderloins in a light egg wash followed by a mix of panko breadcrumbs and spices. If you prefer a lighter, keto-friendly approach, a simple dry rub consisting of garlic powder, paprika, salt, and pepper works wonders.
Consistency is key when applying these coatings; you want an even layer that covers the entire tenderloin without being so thick that it falls off during the cooking cycle. Taking these few minutes to prep properly ensures that your efforts result in a high-quality meal.
Selecting the Right Temperature and Cook Time
The sweet spot for most air-fried poultry is between 375 and 400 degrees Fahrenheit. At 400 degrees, the heat is intense enough to render fat and crisp the exterior quickly, which is ideal if you are using breading like panko.
However, if you are cooking plain, unbreaded strips, you might find that 375 degrees prevents the outside from drying out before the inside is ready. Your specific cook time will usually fall between 8 and 12 minutes, depending on the thickness of the individual pieces and how crowded your basket is during the process.
It is helpful to keep a mental or physical log of your results. If you notice your chicken is browning too fast but remains undercooked in the center, lower the heat by 25 degrees and add a minute or two to the timer. The goal is to reach an internal temperature of 165 degrees Fahrenheit, which is the standard safety benchmark for all poultry.
You should never rely solely on a timer, as the performance of different models can vary wildly. Relying on an instant-read meat thermometer is the only way to guarantee both food safety and perfect texture every single time you cook.
Managing Air Circulation and Basket Capacity
One of the most common mistakes people make when learning how to cook chicken breast tenderloins in air fryer units is overcrowding the basket. Proper air circulation is the secret sauce behind the crispiness.
When pieces of chicken touch or overlap, the air cannot reach the sides, resulting in steamed, pale patches that lack flavor and texture. You should always arrange your tenderloins in a single layer, leaving at least a small gap between each piece so the hot air can flow freely around them.
If you are cooking for a larger group, it is far better to work in two smaller batches than to try to fit everything in at once. While it might seem like a time-saver to jam the basket full, you will end up with unevenly cooked, rubbery meat that requires even more time to fix.
If your air fryer has a rack placement option, use it to keep the chicken elevated from the bottom of the basket. This allows the air to circulate underneath the meat as well, providing a uniform cook that mimics deep frying much more effectively than if the chicken were resting directly on the metal surface.
Addressing Common Food Safety Concerns
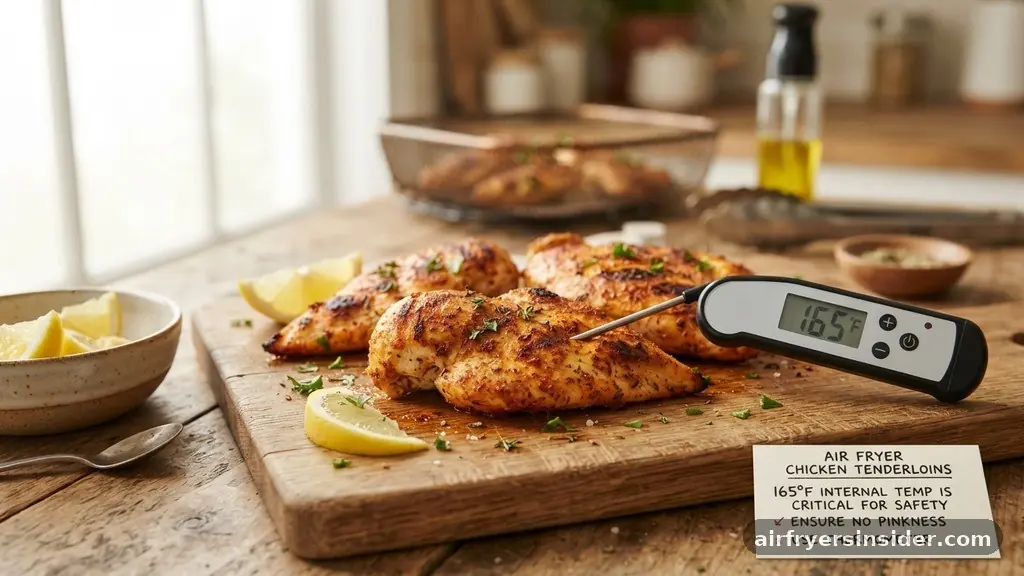
Working with raw poultry always requires a high level of diligence regarding food safety. Salmonella is a legitimate risk, and you must treat every tool and surface that touches the raw meat with caution.
Always wash your hands thoroughly after handling the raw chicken, and avoid cross-contaminating your workspace by keeping your spices and oil bottles away from the raw meat prep area. Once the chicken is cooked, never place it back on the plate or cutting board that held it raw without a thorough sanitization process.
The internal temperature of 165 degrees Fahrenheit is non-negotiable. While some home cooks rely on the “clear juices” test, this is not a reliable metric for safety. A digital meat thermometer is an inexpensive investment that pays for itself by preventing both foodborne illness and the frustration of dry, overcooked chicken.
When you probe the thickest part of the tenderloin, make sure you aren’t hitting a bone or the basket itself, as this can give you a false reading. Prioritizing these safety steps ensures that your kitchen remains a healthy environment for you and your family.
The Science of the Perfect Crispy Coating
Achieving a golden brown, crispy exterior relies on a combination of heat, fat, and starch. Panko breadcrumbs are the gold standard for air frying because their larger flake size allows for more air pockets, which translates to a crunchier bite.
If you prefer a gluten-free option, crushed pork rinds or almond flour can mimic this effect, though they require a bit more attention to prevent burning. The seasoning blend you choose is also vital; garlic powder and paprika add depth and color, but be careful with high-sugar rubs, as they can caramelize and burn before the chicken is fully cooked.
Comparing Coating Methods
| Coating Type | Texture Result | Best For |
|---|---|---|
| Panko Breadcrumbs | Extra Crispy | Classic “fried” chicken style |
| Almond Flour | Light & Nutty | Low-carb or Keto diets |
| Cornstarch Only | Thin & Glassy | Asian-inspired sticky glazes |
| Dry Rub Only | Charred & Savory | Healthy, high-protein snacking |
The secret to a great coating is the application. If you aren’t using breading, make sure your chicken is very dry before applying oil and spices. The oil acts as a medium to transfer the heat from the air to the surface of the protein, effectively “frying” the exterior.
If you have a spray bottle, use it to lightly mist the tops of the chicken halfway through the cooking time. This small addition of oil ensures that any dry spots receive the moisture they need to turn golden rather than staying chalky or burnt.
Solving Topical Gaps and Common Pitfalls
Many beginners struggle with the chicken sticking to the basket or bottom rack. This usually happens because the surface of the chicken was too wet or the basket wasn’t preheated. Always preheat your air fryer for at least three minutes before adding the food.
A hot basket creates an immediate sear, which prevents the meat from bonding to the metal. If you are worried about sticking, a light mist of non-stick spray on the basket surface before adding the chicken can provide an extra layer of insurance.
Another frequent issue involves the seasoning falling off. If you are using a breading, you need a “glue” to hold it in place. A simple egg wash (one egg beaten with a splash of water) is the most effective binder.
If you are avoiding eggs, a thin layer of Greek yogurt or even Dijon mustard can work as a base that adds flavor and holds your spices in place. Don’t be afraid to experiment with these binders to find the flavor profile that best complements the type of meal you are preparing.
Troubleshooting Uneven Cooking
If your tenderloins are coming out with burnt ends and raw centers, your heat is likely too high for the size of the pieces. Remember that tenderloins are naturally uneven, with a thick end and a thin tail.
You can mitigate this by slightly tucking the thin tail under the rest of the meat to create a more uniform shape. If you have a mix of very large and very small pieces, remove the smaller ones as soon as they reach 165 degrees and let the larger ones continue cooking.
Another potential culprit is the placement of the unit itself. Air fryers need space for the exhaust to vent properly. If your machine is pushed right up against a wall or underneath low-hanging cabinets, the hot air can get trapped, leading to poor circulation and inconsistent results.
Ensure your appliance has at least five inches of clearance on all sides. This simple adjustment allows the fan to pull in and push out air efficiently, which is the foundation of a successful air-frying experience.
Incorporating Flavors and Serving Suggestions
Once you have mastered the basic technique, you can elevate your meals by incorporating different flavor profiles. Mediterranean-inspired chicken seasoned with oregano, lemon zest, and garlic is a fantastic option for salads.
For a spicy kick, a blend of chili powder, cumin, and cayenne pepper works perfectly with a cool avocado dipping sauce. The versatility of the tenderloin allows it to act as a blank canvas for almost any cuisine, making it a staple for meal prepping throughout the week.
- Lemon Herb: Use dried oregano, thyme, and lemon zest for a fresh, bright flavor.
- Smoky BBQ: Mix smoked paprika with brown sugar and garlic powder for a classic backyard taste.
- Spicy Cajun: Combine cayenne, black pepper, and onion powder for a bold, zesty finish.
- Garlic Parmesan: Dust the cooked chicken with finely grated parmesan and parsley immediately after removing from the basket.
Because these tenderloins cook so quickly, they are perfect for busy schedules. You can serve them over a grain bowl, toss them into a wrap with fresh vegetables, or serve them alongside roasted root vegetables.
The key is to keep the protein the star of the show by ensuring it remains succulent and flavorful. With a little practice, you will find that cooking chicken breast tenderloins in air fryer models becomes second nature, freeing you up to focus on the creative side of your meal assembly.
Frequently Asked Questions
How long does it take to cook chicken tenderloins at 400 degrees?
At 400 degrees Fahrenheit, chicken tenderloins typically take between 8 and 12 minutes to cook. The exact time depends on the thickness of the meat and how many pieces are in the basket. Always use a meat thermometer to ensure they reach an internal temperature of 165 degrees.
Do I need to preheat my air fryer before cooking chicken?
Yes, preheating for about three to five minutes is highly recommended. A preheated basket creates an immediate sear upon contact, which helps lock in juices and prevents the chicken from sticking to the bottom of the rack. It also ensures more consistent cooking times across the entire batch.
Can I cook frozen chicken tenderloins directly in the air fryer?
Yes, you can, but you will need to adjust the time and temperature. Lower the heat to 375 degrees and increase the cooking time by several minutes to ensure the center thaws and cooks through. It is generally better to thaw them first for the best texture and coating adhesion.
How do I stop the breading from falling off?
To keep your coating intact, ensure the chicken is very dry before adding a binder like an egg wash or mustard. Press the breading firmly onto the surface of the chicken and let it sit for a few minutes before cooking. Avoid shaking the basket too vigorously while the chicken is inside.
Conclusion
Perfecting the process of cooking chicken breast tenderloins in air fryer appliances is a rewarding skill that changes how you approach quick, healthy meals. By focusing on proper surface preparation, maintaining adequate airflow, and relying on internal temperature rather than guesswork, you can consistently produce poultry that is both juicy and crisp. Whether you are experimenting with bold spice blends or sticking to classic breaded favorites, the air fryer offers a level of convenience that is hard to match with traditional cooking methods.
Take the time to experiment with the different settings on your specific machine, as every model has its own unique personality regarding airflow and heat intensity. Start with a simple dry rub to get a feel for the timing, then move on to breaded varieties once you feel comfortable.
With these techniques in your repertoire, you will find it easier than ever to maintain a consistent, high-quality protein source for your daily meals. Happy cooking, and enjoy the delicious results of your newfound air-frying expertise.
Meta Description: Learn how to cook chicken breast tenderloins in air fryer to get a perfectly crispy exterior and juicy interior every time with these expert tips.