
Learning how to cook pumpkin seeds in air fryer is one of the most efficient ways to transform those leftover guts from your autumn jack-o’-lantern into a crunchy, nutrient-dense treat. Unlike traditional oven roasting, which often requires significant time and energy, the air fryer utilizes rapid convection heat to achieve a perfect, golden brown finish in a fraction of the time.
Whether you call them pumpkin seeds or pepitas, these tiny powerhouses are packed with essential minerals like magnesium and zinc. By mastering a few simple techniques, you can turn a kitchen waste product into a high-fiber snack that satisfies cravings while providing a satisfying, nutty flavor.
Understanding the Efficiency of Convection Heat
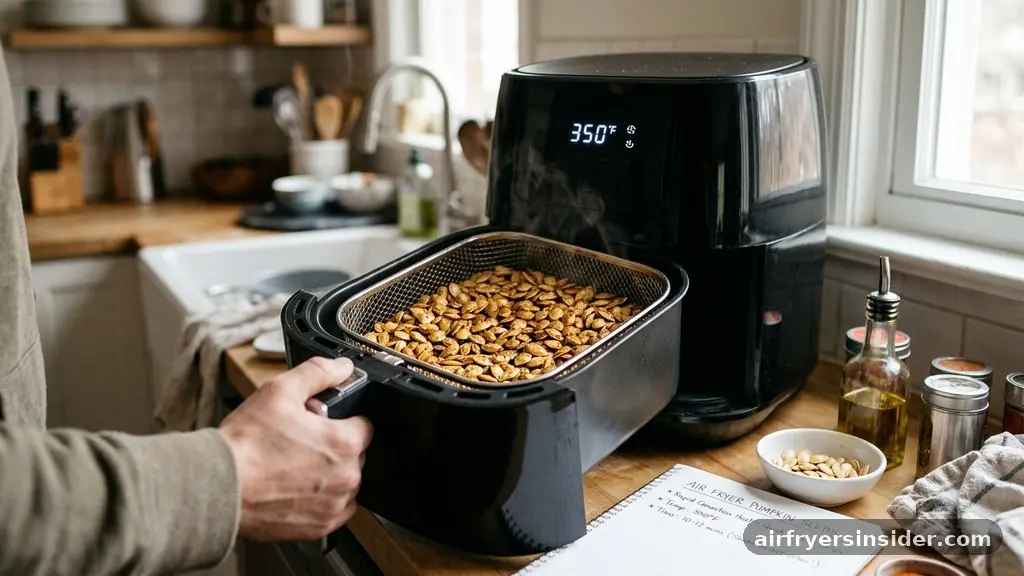
The primary advantage of using an air fryer for your seeds lies in the mechanics of the appliance itself. An air fryer is essentially a high-powered convection oven that circulates hot air at high speeds around the food.
When you are cooking pumpkin seeds in an air fryer, this intense airflow ensures that the outer shell of the seed dehydrates quickly while the interior remains tender and flavorful. This process creates a consistent, crispy texture that is often difficult to achieve in a standard oven, where heat distribution can be uneven.
Because the chamber is smaller than a conventional oven, the heat intensity is concentrated. This means you do not need to wait for a large appliance to preheat for twenty minutes before you start. The rapid circulation also means that moisture is whisked away from the surface of the seeds almost immediately.
This is the secret to getting that satisfying crunch without burning the edges. By managing the airflow, you effectively toast the seeds from all sides simultaneously, resulting in a uniform color and texture that makes for a superior snacking experience.
Selecting and Preparing Your Fresh Seeds
Before you even think about seasoning, the quality of your raw material matters. If you are carving pumpkins, set aside some time to separate the seeds from the fibrous pulp. This can be a tedious process, but it is necessary for achieving the best results.
Place the seeds in a colander and run them under cold water, using your fingers to rub away the stringy orange flesh. It is perfectly fine if a little bit of pulp remains, as it adds a rustic feel, but removing the bulk of it prevents your seeds from steaming instead of roasting.
Once cleaned, pat the seeds thoroughly with a paper towel or a clean kitchen cloth. Moisture is the enemy of a crispy finish. You want the seeds to be as dry as possible before they hit the heat.
Some enthusiasts prefer to let them air-dry on a flat tray for an hour, but if you are in a rush, a firm pat-down works wonders. Proper drying ensures that the oil and spices you add later will adhere to the surface rather than sliding off into the bottom of the air fryer basket.
The Science of Parboiling for Better Texture
If you want the absolute best results, you might consider the technique of parboiling. Before tossing the seeds into the air fryer, boil them in salted water for about ten minutes.
This step might seem counterintuitive, but it actually helps to soften the outer shell slightly while infusing the interior with flavor. The salt penetrates the seed coat, ensuring that the flavor isn’t just on the surface, but integrated into the bite.
After boiling, drain the seeds well and pat them dry again. You will notice that they have puffed up slightly. When you transfer these parboiled seeds to the air fryer, they tend to crisp up more evenly because the initial moisture has been regulated.
This method is particularly useful if you find that raw-roasted seeds are sometimes too tough or woody to chew comfortably. While this adds a few minutes to your total preparation time, the impact on the final texture is significant and well worth the effort for those who prioritize a premium snack.
Mastering the Seasoning Blend
The beauty of cooking pumpkin seeds in an air fryer is the versatility of the flavor profiles you can create. Since the seeds are relatively neutral in taste, they act as a perfect canvas for both sweet and savory applications.
Start with a high-quality fat, such as olive oil or melted butter, to help the spices stick to the shells. You only need a light coating; too much oil will make them soggy rather than crispy.
For a classic savory approach, stick to sea salt and freshly cracked black pepper. However, do not be afraid to experiment with more complex seasoning blends. Smoked paprika adds a wonderful depth and a hint of warmth, while garlic powder provides a savory punch that balances the natural sweetness of the seed.
If you prefer a bit of heat, a pinch of cayenne or chili powder works beautifully. When using powdered spices, add them after the initial toss in oil to ensure an even distribution across every single seed.
| Flavor Profile | Key Ingredients | Best For |
|---|---|---|
| Savory Classic | Sea salt, cracked pepper, garlic powder | Everyday snacking |
| Smoky Heat | Smoked paprika, cayenne, cumin | Pairing with drinks |
| Sweet & Warm | Cinnamon, brown sugar, nutmeg | Topping yogurt or oatmeal |
Optimizing the Air Fryer Basket
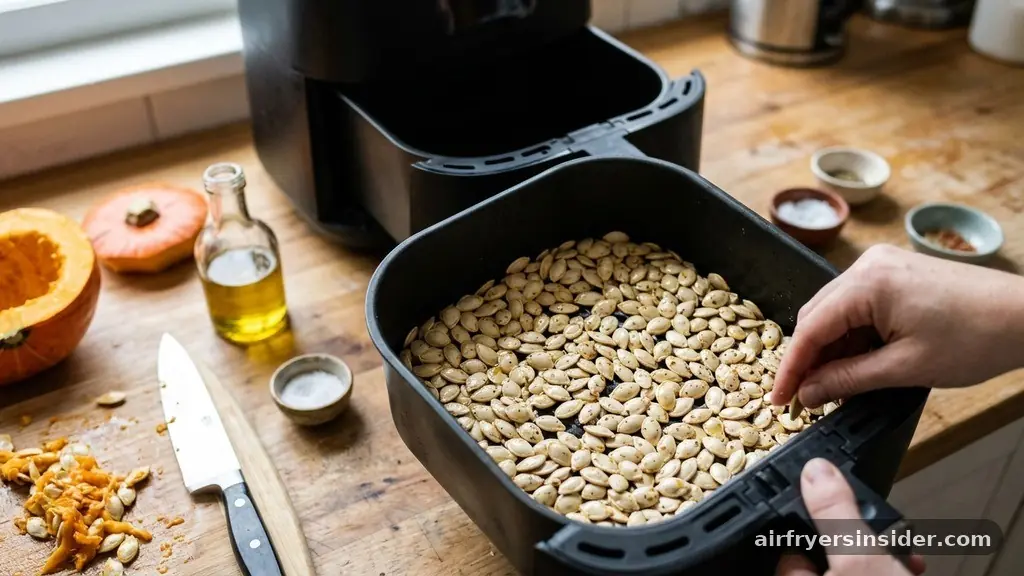
How you arrange the seeds in your air fryer basket significantly impacts the cooking time and quality. The most common mistake is overcrowding the basket.
You want the seeds to be in a single layer, or as close to it as possible, to allow the hot air to circulate between them. If you stack them too high, the seeds in the middle will remain soft and pale while the ones on the outside might overcook.
If you are concerned about the seeds falling through the holes of the basket, you can use a piece of parchment paper cut to size. Ensure there is enough space around the edges for the air to flow upwards.
Using a light spritz of oil on the parchment paper can help prevent sticking. Remember that the goal is consistent exposure to the convection heat, so if you have a massive batch, it is far better to cook them in two smaller cycles than to cram them all into one session.
The Shake Method for Even Results
The shake method is the most critical part of the process once the timer starts. Because the air fryer is so efficient, the seeds can go from perfectly toasted to burnt in less than a minute.
You must pull the basket out every three to four minutes to give the seeds a good shake. This movement redistributes the seeds, ensuring that those that were on the bottom now have a chance to reach the top where the heat is most intense.
Do not be tempted to skip this step. Even with high-end kitchen gadgets, air fryers have hot spots. Shaking the basket is the only way to guarantee that you won’t end up with a mix of burnt seeds and raw ones.
If you find that the seeds are flying around too much, you can use a spatula to stir them manually. This is also a good time to check the color; you are looking for a light golden brown. Once they reach this color, remove them immediately, as they will continue to crisp up slightly as they cool down.
Addressing Common Topical Gaps
Many people wonder if they can cook pumpkin seeds in an air fryer if they don’t have the fresh variety. The answer is a resounding yes. If you are using store-bought raw pepitas, the process is actually much faster because they are already cleaned and dried.
You can simply toss them with a little oil and your chosen seasonings and roast them for about five to seven minutes. Because there is no outer shell to penetrate, they brown very quickly, so keep a close eye on the timer.
Another common question involves the health benefits compared to other snacks. Pumpkin seeds are a nutritional powerhouse, offering high levels of plant-based protein and healthy fats. They are also a fantastic source of magnesium, which supports muscle and nerve function, and zinc, which is essential for immune health.
By preparing them at home in the air fryer, you avoid the excessive sodium and preservatives often found in commercial, store-bought bagged snacks. This makes the entire process of cooking pumpkin seeds in an air fryer a smart choice for those looking to improve their dietary fiber intake while enjoying a delicious, crunchy snack.
- Always preheat your air fryer for three minutes to ensure immediate heat application.
- Use a light hand with oil; a little goes a long way.
- Monitor the seeds closely in the final two minutes of cooking to prevent burning.
- Allow the seeds to cool completely on a wire rack to maintain their crunch.
- Store your finished seeds in an airtight container to maximize shelf life.
Cooling and Proper Storage
Once you remove the seeds from the air fryer, the temptation to eat them immediately is strong, but patience is required. As the seeds cool, the residual moisture evaporates, and the shell hardens into that signature crispy texture.
If you store them while they are still warm, the trapped steam will make them soft and chewy within hours. Let them sit on a tray or a wire cooling rack for at least ten to fifteen minutes before you package them.
If you have made a large batch, proper storage is the key to maintaining their quality. Because these seeds are rich in healthy fats, they can go rancid if exposed to air and light for too long. Use an airtight container or a glass jar kept in a cool, dark place.
If you live in a particularly humid climate, storing them in the refrigerator can help keep them fresh for longer. When stored correctly, your homemade roasted seeds can maintain their peak flavor and crunch for up to two weeks, though they rarely last that long in most households.
Troubleshooting Common Issues
Even with the best preparation, you might encounter a few hiccups during your first few attempts. If your seeds come out burnt but the centers are still soft, your temperature is likely too high. Try lowering the setting by 25 degrees and extending the cooking time slightly.
If the seeds are consistently chewy, you likely didn’t dry them enough before starting. Remember that moisture is the primary cause of a lack of crunch, so ensure those seeds are bone-dry before adding any oil.
Conversely, if your seasoning is falling off, it usually means you added the spices before the oil or that you used too little oil. The oil acts as a glue, so make sure the seeds are evenly coated with a thin layer of fat before you sprinkle your salt and spices.
If you find the seeds are sticking to the basket, don’t be afraid to use a thin layer of parchment paper. These minor adjustments will help you dial in the perfect process for your specific air fryer model, making every batch better than the last.
FAQ
How long should I cook pumpkin seeds in an air fryer?
Most pumpkin seeds require between 8 to 12 minutes at 350°F. However, the exact time depends on the size of the seeds and your specific air fryer model. It is best to start checking them at the 7-minute mark to ensure they do not burn.
Do I need to peel the pumpkin seeds before air frying?
No, you do not need to peel them. The outer shell, or hull, becomes crispy and delicious when air fried. If you prefer, you can use pre-shelled seeds, known as pepitas, but they will cook much faster and require careful monitoring to avoid burning.
How can I tell when the seeds are done?
The seeds are finished when they turn a light golden brown and smell fragrant. They should feel firm to the touch. If you are unsure, remove one, let it cool for a minute, and taste it to check for the desired crunch and texture.
Can I use parchment paper in the air fryer?
Yes, you can use parchment paper to prevent sticking or to make cleanup easier. Just ensure it is trimmed to fit the basket and that you do not block the airflow. Avoid using wax paper, which is not designed for high-heat environments.
Conclusion
Mastering the art of cooking pumpkin seeds in an air fryer is a rewarding skill that turns a simple kitchen task into a routine of healthy snacking. By focusing on proper drying, consistent shaking, and mindful temperature control, you can produce a snack that rivals anything found in a grocery store aisle. Whether you prefer a simple touch of sea salt or a bold, spicy seasoning blend, the flexibility of this method ensures that you can tailor the results to your personal preferences.
Start with a small batch to learn the quirks of your specific appliance, and you will soon find yourself keeping a stash of these crispy, nutrient-rich seeds on hand for whenever a craving strikes. Enjoy the process of experimenting with flavors and sharing your homemade creations with friends and family.
Meta Description: Learn how to cook pumpkin seeds in air fryer with this easy guide. Get the perfect crispy texture, seasoning tips, and storage advice for healthy snacking.