


Figuring out exactly how long to cook tilapia in an air fryer is the secret to moving away from rubbery, dried-out fish and toward a perfectly flaky, moist fillet. Because air fryers use high-speed convection cooking, they can turn a thin piece of white fish into a dinner-ready meal in just minutes.
Getting the timing right depends on a few variables like fillet thickness and your specific machine, but once you master the basics, it becomes one of the most reliable weeknight staples in your kitchen. Achieving that ideal crispy crust while keeping the inside tender requires precision and a little bit of technique.
Understanding the Mechanics of Air Frying Fish
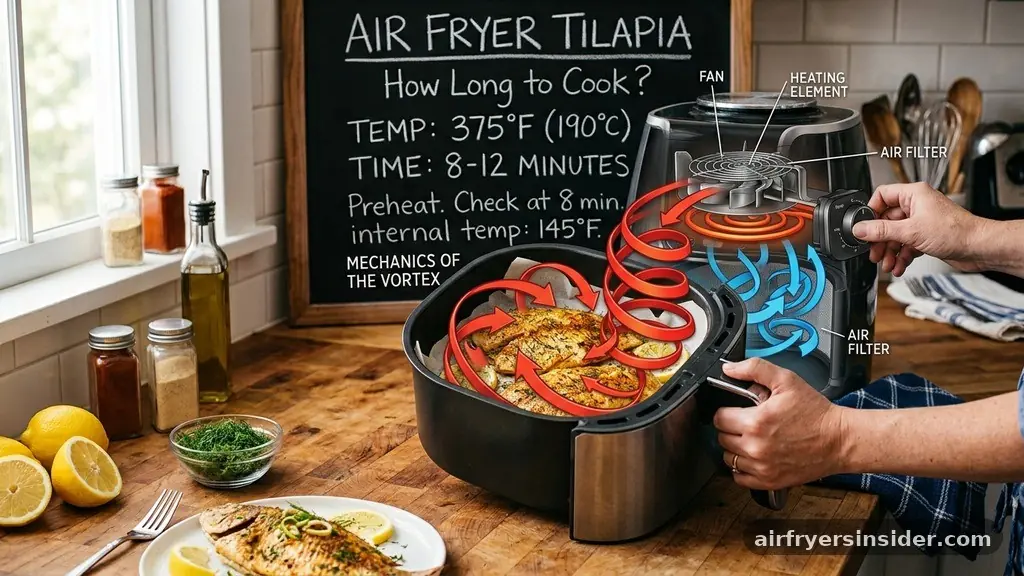
The air fryer functions like a compact, high-powered convection oven. When you place a delicate protein like tilapia inside the basket, the machine circulates superheated air at a high velocity.
This rapid movement of air is what creates the golden-brown surface we love, but it also means that moisture evaporates much faster than it would in a traditional oven. Because tilapia is a lean, mild-flavored fish, it doesn’t have the high fat content of salmon to protect it from drying out.
Understanding that the air fryer is essentially a rapid-dehydration device helps you adjust your approach. You aren’t just heating the fish; you are quickly searing the exterior while the interior cooks through via conducted heat. This is why the cooking time is so short compared to other cooking methods.
If you leave the fish in for even two or three minutes too long, you risk turning a succulent meal into something tough and chalky. Success starts with recognizing that smaller, thinner fillets will naturally finish faster than thicker, restaurant-sized portions.
Determining the Ideal Cooking Time and Temperature
Most home cooks find that 400 degrees Fahrenheit is the sweet spot for cooking tilapia. At this temperature, the air fryer creates a Maillard reaction on the surface of the fish, which is what gives you that desirable crispy crust.
Generally, you should plan on a cooking time of seven to nine minutes for a standard six-ounce fillet. If your fillets are particularly thin, start checking them at the six-minute mark.
If you prefer a gentler cook, you can drop the temperature to 375 degrees Fahrenheit and add a minute or two to the total duration. However, for most breaded or seasoned recipes, the higher heat of 400 degrees is superior because it sets the coating before the fish starts to release too much moisture. Always remember that the air fryer basket’s capacity matters; if you crowd the basket, the air cannot circulate properly, leading to uneven cooking and soggy spots rather than the crisp texture you are aiming for.
Preparing the Fish for Optimal Texture
Before you even think about the clock, the preparation phase dictates the final result. Always pat your tilapia fillets dry with a paper towel before applying any oil or seasoning. Moisture on the surface of the fish creates steam, which is the enemy of a crispy exterior.
Once the fish is dry, brush it lightly with olive oil or use a quick spritz of non-stick cooking spray. This fat acts as a conductor for heat, ensuring the seasoning rub adheres and browns evenly.
Seasoning is where you can get creative, but don’t overcomplicate it. A simple blend of garlic powder, paprika, salt, and pepper works beautifully. If you want a bit more crunch, consider pressing the fillets into panko breadcrumbs after seasoning.
The panko creates a light, airy barrier that protects the delicate meat inside. For an extra punch of flavor, a squeeze of fresh lemon juice immediately after cooking brightens the entire dish and cuts through the richness of the breading.
Using a Food Thermometer to Ensure Safety
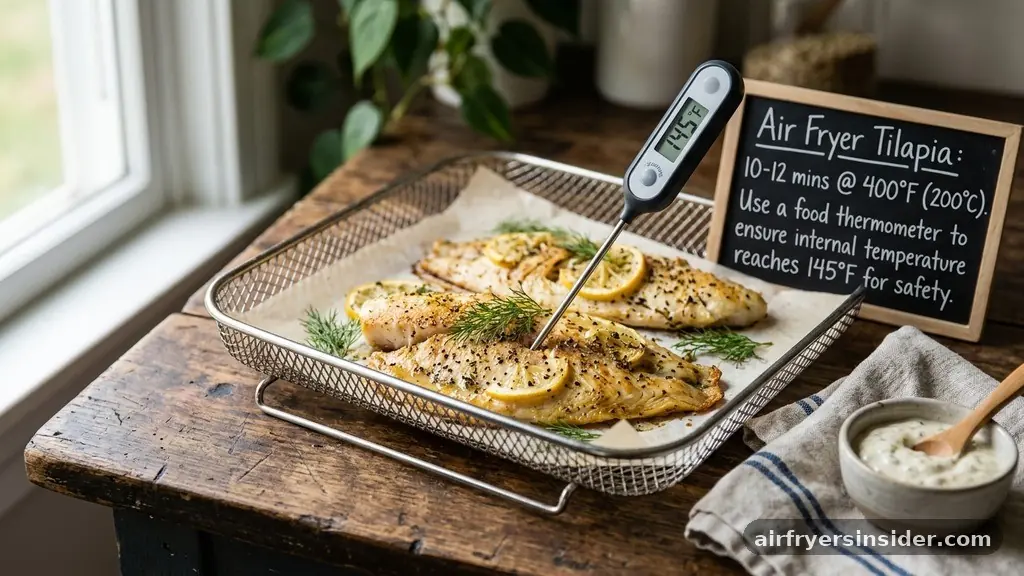
While timing is a helpful guide, it is never a substitute for checking the internal temperature of your food. According to FDA guidelines for seafood safety, fish should reach an internal temperature of 145 degrees Fahrenheit. Using a digital food thermometer is the only way to be 100% certain that your tilapia is safe to eat without overcooking it.
Insert the probe into the thickest part of the fillet. If the thermometer reads 145 degrees, remove the fish from the air fryer immediately. Because the fish will continue to cook slightly from residual heat during its resting time, you can often pull it out when it hits 140 degrees and let it sit for two minutes.
This resting period allows the juices to redistribute, ensuring that every bite remains moist. If you don’t have a thermometer, look for the flesh to turn opaque and flake easily when nudged with a fork.
Common Mistakes That Lead to Overcooking
The most frequent error when learning how long to cook tilapia in an air fryer is failing to preheat the unit. Even though many people think of air fryers as “instant,” they perform much better when they have reached the target temperature before the food goes in. A cold basket means the fish sits in a tepid environment while the machine ramps up, which can lead to a mushy texture rather than a crisp one.
Another mistake is flipping the fish too aggressively or too often. Tilapia is a very fragile, flaky fish. If you try to flip it mid-cycle and the crust hasn’t set, you will end up with broken pieces.
If you have coated your fish in panko, you may not need to flip it at all, provided your air fryer has good circulation. Now you do decide to turn it, use a wide, thin spatula and handle it with extreme care.
Addressing Variations in Fillet Thickness
One of the most common issues is dealing with fillets of uneven thickness. If one end of the fish is thin and the other is thick, the thin end will inevitably dry out before the thick end is cooked.
To solve this, you can tuck the thin tail end of the fillet underneath itself to create a uniform shape. This simple trick ensures that the entire piece of fish cooks at the same rate, preventing the dreaded “dry tail” scenario that plagues many home-cooked seafood dishes.
Essential Tips for Success with Air Fryer Fish
To get the most out of your air fryer, consider these best practices for preparing and cooking white fish:
- Always preheat your air fryer for at least three to five minutes before adding the fish.
- Use parchment paper liners designed for air fryers to prevent sticking, but ensure they are weighted down by the food so they don’t blow into the heating element.
- Never stack fillets; they must be in a single layer with space between them for air to move.
- If using a heavy breading, spray the top of the breading with oil to help it brown properly.
- Keep a record of your cooking times for the specific thickness of fillets you usually buy.
Following these steps will drastically improve your consistency. The goal is to reach that perfect flaky texture where the fish practically falls apart at the touch of a fork. If you are struggling with the fish sticking to the basket, ensure you are using a high-quality non-stick spray or a bit of oil on the grate itself before placing the fish down.
Comparing Cooking Methods for Tilapia
While many people love the convenience of the air fryer, it is helpful to see how it stacks up against traditional methods. The following table highlights the differences in texture and time for a standard 6-ounce fillet.
| Method | Cooking Time | Texture | Fat Content |
|---|---|---|---|
| Air Fryer | 7-9 Minutes | Crispy, Flaky | Low |
| Oven Bake | 12-15 Minutes | Moist, Tender | Low |
| Pan Sear | 5-7 Minutes | Golden-Brown | Moderate |
| Deep Fry | 4-5 Minutes | Very Crispy | High |
As you can see, the air fryer offers a middle ground, providing a texture closer to deep-frying but with the health benefits of lower oil usage. It is arguably the most efficient way to cook tilapia during a busy weeknight when you don’t want to heat up the entire kitchen.
Frequently Asked Questions
Do I need to flip tilapia when cooking it in an air fryer?
It is generally recommended to flip the fish once halfway through the cooking time to ensure even browning. However, if you are using a breaded coating like panko, be extremely gentle with your spatula to avoid breaking the delicate crust or the fish itself.
What is the best internal temperature for tilapia?
According to food safety standards, the internal temperature should reach 145 degrees Fahrenheit. Using a food thermometer is the best way to confirm this without guessing. If you prefer your fish slightly less cooked, you can remove it at 140 degrees and let it rest.
Can I cook frozen tilapia directly in the air fryer?
Yes, you can cook frozen tilapia, but you will need to add about 3 to 5 minutes to the total cooking time. It is helpful to season the fish after it has thawed slightly for a few minutes in the air fryer, as seasoning will not stick to a frozen, icy surface.
Why does my tilapia come out dry?
Dryness usually results from overcooking or not using enough fat. Since tilapia is a very lean fish, it needs a light coating of oil to stay moist. Ensure you aren’t leaving the fish in the air fryer for too long; start checking for doneness a minute before the timer goes off.
Final Thoughts on Mastering Air Fried Fish
Perfecting your technique for how long to cook tilapia in an air fryer is a journey of trial and error that pays off in healthy, delicious meals. By focusing on consistent fillet thickness, proper preheating, and the use of a thermometer, you remove the guesswork from the process. Whether you prefer a simple seasoning rub or a crunchy panko crust, the air fryer is a versatile tool that respects the delicate nature of white fish while delivering the texture you crave.
Start with the seven-minute baseline, keep a close eye on your first few attempts, and you will quickly find the exact timing that works for your specific appliance. Enjoy the process of refining your cooking, and don’t be afraid to experiment with different spice blends to keep your dinner routine exciting and fresh.


