


Learning how to dehydrate apples in air fryer units allows you to transform fresh fruit into shelf-stable, crunchy snacks without needing a dedicated dehydrator. By leveraging the convection airflow already present in your kitchen appliance, you can create consistent, healthy treats that satisfy cravings for something sweet and crispy. Because air fryers use high-speed fans to circulate heat, they are surprisingly effective at removing moisture from thin produce slices.
This process is faster than traditional oven drying and provides more control than leaving fruit out to air dry. Once you master the temperature and timing, you will have a reliable method for preserving seasonal harvests all year round.
Selecting the Right Apple Varieties for Dehydration
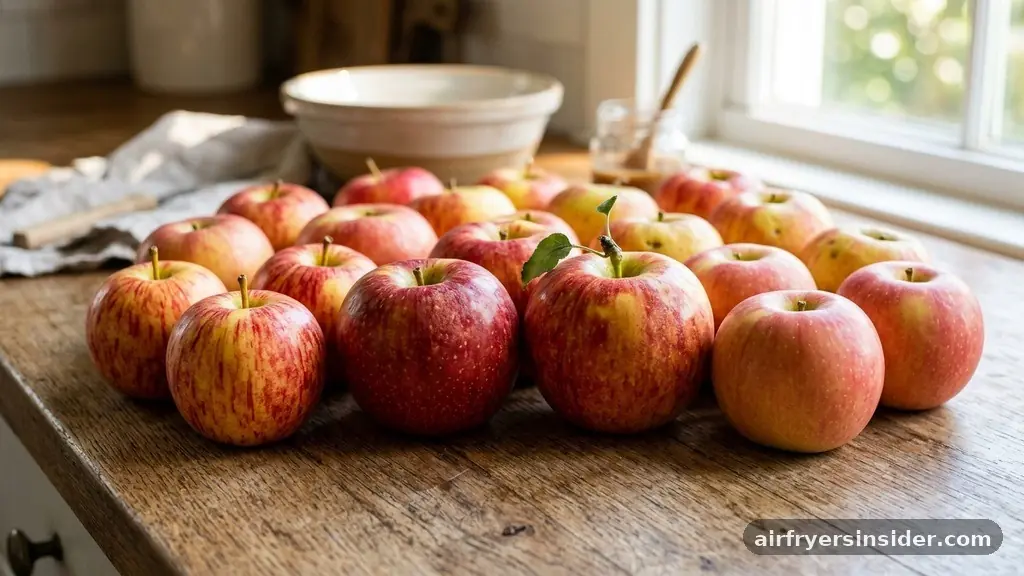
Not every apple performs the same way when exposed to heat. When you are interested in how to dehydrate apples in air fryer machines, your choice of fruit impacts the final texture and flavor profile. You generally want an apple that holds its shape well and offers a balance of sweetness and tartness.
Honeycrisp apples are a popular choice because they have a naturally crisp structure and a high sugar content, which caramelizes beautifully during the drying process. Other excellent varieties include Fuji, Gala, and Pink Lady, as these tend to maintain their integrity without turning into mush.
Avoid softer varieties like McIntosh or Red Delicious, as these can become mealy or lose their shape too quickly under heat. The goal is to produce firm, satisfying chips rather than thin, limp pieces of fruit. If you enjoy a sharper flavor, Granny Smith apples provide a wonderful tartness that pairs exceptionally well with a light cinnamon dusting.
Regardless of the variety, always choose fruit that feels firm to the touch with no soft spots or bruising. High-quality raw ingredients are the foundation of successful food preservation, and selecting the right apple ensures your final snack has the best possible texture.
The Importance of Uniform Apple Slices
Consistency is the secret to success when preparing fruit for the air fryer. If your pieces vary significantly in thickness, some will end up leathery while others burn before they are fully dried. Using a mandoline slicer is the most efficient way to achieve uniform results.
This tool allows you to set a specific thickness, usually around one-eighth of an inch, which is the sweet spot for creating perfectly crunchy apple chips. If you do not have a mandoline, a sharp chef’s knife and a steady hand will work, but you must take your time to ensure all slices are as even as possible.
Think of each slice as a small project in moisture management. Thinner slices will reach the desired crispiness much faster, but if they are too thin, they may become brittle or stick to the basket. Aim for a thickness that allows for a slight bit of flexibility before the final cooling phase.
By maintaining uniform thickness across your entire batch, you ensure that the air circulation within the appliance hits every piece equally. This uniform approach prevents the frustration of checking the basket every few minutes to remove individual chips that finished early, making your batch processing much more efficient.
Preventing Oxidation and Fruit Browning
One common hurdle when preparing fresh produce for drying is enzymatic browning. As soon as you slice an apple, the exposed flesh reacts with oxygen, causing it to turn brown. While this doesn’t ruin the flavor, it can make your chips look unappealing.
To prevent this, you can toss your slices in a bowl with a little lemon juice or a solution of water and citric acid. The acidity neutralizes the enzymes responsible for oxidation, keeping your apple slices looking bright and fresh throughout the dehydration process.
If you prefer not to use lemon juice, you can simply work quickly. Slice the apples and immediately place them into the air fryer basket to begin the drying process. However, for larger batches, the lemon juice method is highly recommended to ensure the quality remains consistent from the first slice to the last.
Some enthusiasts also use a quick soak in a honey-water mixture, which adds a subtle sweetness and helps maintain a lighter color. Whether you choose acidulated water or a natural sweetener, the key is to treat the fruit immediately after slicing to halt the browning process before it starts.
Optimizing Airflow and Temperature Settings
Understanding how to dehydrate apples in air fryer systems requires you to treat the appliance like a miniature convection oven. You are not actually “frying” the fruit; you are engaging in low temperature cooking. Most air fryers have a minimum temperature setting, often around 150°F to 180°F.
If your unit has a dedicated dehydrator setting, use it, as this usually optimizes the fan speed to be gentler, preventing the light slices from flying around inside the chamber. If your unit lacks this setting, choose the lowest possible temperature available.
Proper air circulation is essential for removing moisture from the fruit. You should avoid overcrowding the basket. While it is tempting to stack the slices, they need space for the hot air to pass through them.
If you stack them too high, the middle slices will remain soft and moist while the outer ones become overly dry. Using a wire rack insert or a specialized air fryer accessory can help keep the slices in place and improve airflow. If you notice your slices are blowing around, you might need to place a small piece of parchment paper or a metal rack on top of them to keep them weighted down.
Mastering the Drying Timeline
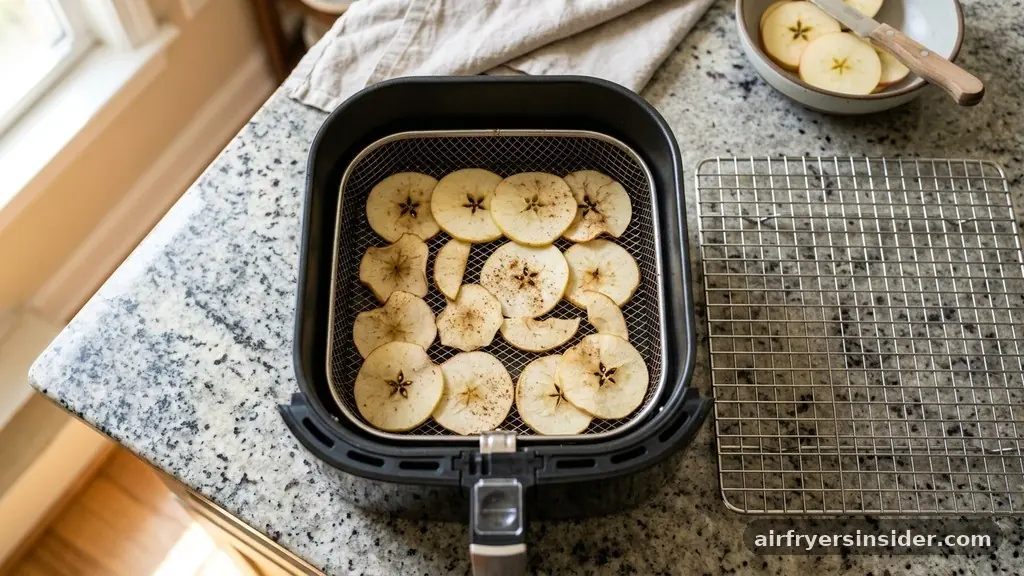
The time required to dehydrate apples in an air fryer varies based on your specific machine, the thickness of your slices, and the ambient humidity in your kitchen. On average, you can expect the process to take anywhere from 60 to 90 minutes. It is vital to check the apples periodically.
Around the 45-minute mark, begin checking for texture. They should feel dry to the touch, but they may still feel slightly pliable while inside the hot unit. Remember that the final crispiness develops as they cool down on a rack outside the air fryer.
If you find that your chips are still chewy after an hour, simply continue the process in 10-minute increments. Do not rush this step by increasing the temperature, as higher heat will cook the fruit rather than dehydrate it, leading to burnt edges and a bitter taste.
The goal is to slowly evaporate the moisture content over a longer period. Keeping a small log or note on your phone regarding how long your specific air fryer takes to complete a batch can be incredibly helpful for future attempts, especially when you start experimenting with different apple varieties.
Addressing Common Challenges
Even experienced home cooks encounter issues when learning how to dehydrate apples in air fryer units. Below is a table highlighting common problems and their solutions to help you troubleshoot your process.
| Problem | Cause | Solution |
|---|---|---|
| Slices are not crispy | Too much moisture left | Extend drying time or use thinner slices |
| Edges are burnt | Temperature is too high | Lower the heat and check more frequently |
| Apples are brown | Oxidation occurred | Use lemon juice or citric acid soak |
| Slices are stuck together | Overcrowding the basket | Use fewer slices per batch |
By identifying these issues early, you can adjust your technique. If you find that your chips are still soft after cooling, it is likely that they were not dried long enough. Don’t worry—you can always put them back in for another short cycle.
If they are burnt, your air fryer might run hotter than the dial suggests, so try dropping your temperature by 10 to 20 degrees on the next run. Success is often found through these small, iterative adjustments to your specific equipment’s performance.
Enhancing Flavor with Spices and Toppings
Once you have mastered the basic technique, you can elevate your apple chips with simple seasonings. A classic cinnamon dusting is the most popular choice, as it complements the natural sugars of the apple.
To get the best results, toss the wet apple slices in a mixture of cinnamon and a tiny amount of sugar or sweetener before placing them in the basket. The natural stickiness of the fruit will hold the spice in place as it dries.
Beyond cinnamon, consider experimenting with other flavors:
- Nutmeg or cloves for a warming, autumnal snack profile.
- A sprinkle of sea salt to balance the sweetness of the fruit.
- Cardamom for an exotic, floral note that pairs perfectly with tart varieties.
- Chili powder or cayenne for those who prefer a savory, spicy-sweet combination.
Adding these seasonings before the dehydration process allows the flavors to intensify as the moisture evaporates. Just be sure to use spices sparingly, as their potency can become quite strong once concentrated in a dried chip. If you prefer to add toppings after the chips are finished, you can lightly mist the cooled chips with a tiny amount of oil or water to help the seasoning adhere to the surface.
Proper Storage for Maximum Shelf Life
Proper storage is the final step in the process of dehydrating apples in an air fryer. If you leave your finished chips sitting out on the counter, they will quickly reabsorb moisture from the air, losing their crunch. Once the chips have cooled completely on a cooling rack, transfer them into an airtight container.
Glass jars or vacuum-sealed bags are ideal for long-term snack storage. If you live in a particularly humid climate, consider adding a food-grade desiccant packet to the container to ensure the chips stay crisp for as long as possible.
When stored correctly, dehydrated apples can last for several weeks. However, because they lack the preservatives found in store-bought snacks, it is best to consume them within a month for the best flavor. Always store your containers in a cool, dark place away from direct sunlight.
If you notice any signs of moisture inside the container after a day or two, it is a sign that the apples were not fully dehydrated. You can return them to the air fryer for a quick 5-minute refresher to remove the remaining moisture before storing them again.
Addressing Topical Gaps
One common question is whether you need to peel the apples before dehydrating them. The answer depends on your personal preference. Keeping the skin on provides extra fiber, a beautiful color contrast, and a slightly firmer bite.
However, some people find the texture of dried apple skin to be slightly tough. If you prefer a more uniform, tender chip, feel free to peel the apples before slicing. Another gap in knowledge involves the use of oil.
You generally do not need to add oil to the apples; the air fryer’s convection airflow is sufficient to dry them out. Adding oil can actually prevent the fruit from drying out properly and may lead to a greasy finish.
Another frequent concern is the noise level during the process. Since the air fryer fan runs continuously for an hour or more, it can be quite noisy. If this is a concern, plan your dehydration for a time when the noise won’t be disruptive.
Finally, many users wonder about the “Ninja Foodi” or similar multi-cooker models. These machines are excellent for this task because they often feature a dedicated “Dehydrate” button that is perfectly calibrated for this exact purpose. If you have a machine with this setting, use it, as it will likely yield more consistent results than using a standard “Air Fry” mode.
FAQ
How long does the dehydration process usually take?
Typically, it takes between 60 and 90 minutes at a low temperature. The exact time depends on your apple slices’ thickness and the specific air fryer model. Always check at the 45-minute mark and adjust as needed to reach your desired level of crispiness.
Do I need to soak the apples before starting?
Soaking is not strictly necessary, but it is highly recommended if you want to prevent oxidation. Dipping slices in a mixture of water and lemon juice or citric acid keeps the apples from turning brown, ensuring they look fresh and appetizing once dried.
Why are my apple chips still soft after cooling?
If the chips remain soft or pliable after cooling, they likely still have too much moisture content. This means they were not dried for long enough. Simply return them to the air fryer for another 10 to 15 minutes to finish the process.
Can I dehydrate other fruits in the air fryer?
Yes, you can use the same technique for other fruits like pears, bananas, or strawberries. Keep in mind that different fruits have different water contents and sugar levels, so you will need to adjust the drying time accordingly to prevent burning or under-drying.
Conclusion
Mastering the process of how to dehydrate apples in air fryer units is a rewarding way to create healthy, homemade snacks. By focusing on uniform slicing, proper temperature control, and the right storage techniques, you can ensure a consistent supply of delicious, crunchy fruit chips. Whether you stick to simple, natural apple slices or experiment with creative spice blends like cinnamon or cardamom, this method offers a fast and efficient alternative to traditional drying methods.
Now that you have the knowledge to get started, grab your favorite apples and try a small batch in your air fryer today. You will likely find that these homemade treats are far superior to anything you can buy at the store, and they provide a great sense of satisfaction once you pull that first perfectly crispy batch from the basket.
Meta Description: Learn how to dehydrate apples in air fryer units with this step-by-step guide. Discover tips for perfect crispiness, preventing browning, and storage.


