


Mastering the art of reheating garlic bread in air fryer setups transforms yesterday’s leftovers into a fresh, indulgent snack that tastes like it just came out of the oven. Most people struggle with soggy centers or burnt edges when using a microwave, but the forced convection environment of an air fryer provides exactly what bread needs: a balance of heat and airflow.
By managing your temperature and timing, you can restore that satisfying crunch and buttery richness without drying out the crumb. Whether you are dealing with thick slices or a pull-apart loaf, this method ensures your bread returns to its peak state of crispy, golden perfection every single time.
Why the Air Fryer Outperforms Other Kitchen Appliances
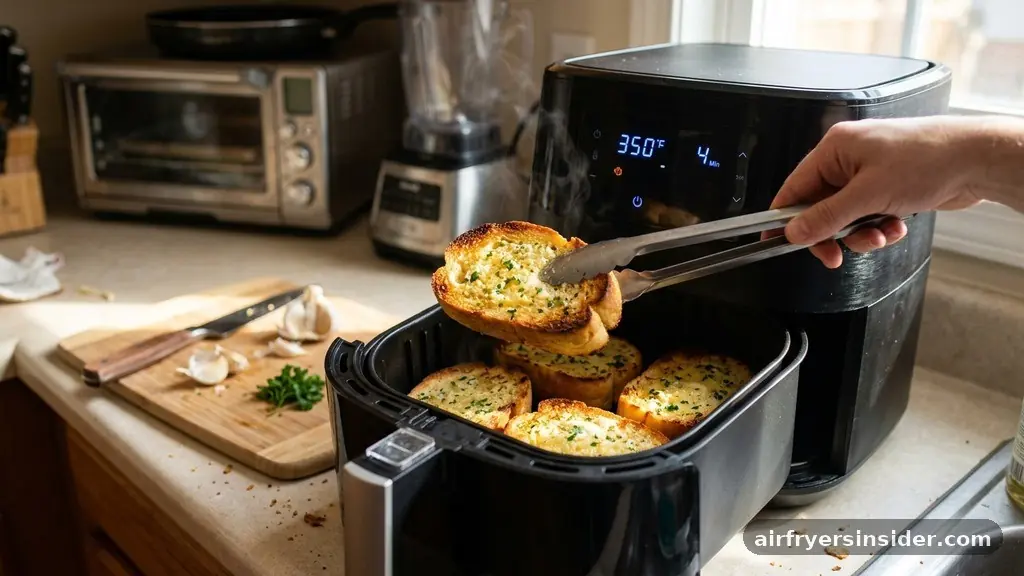
When you consider how to reheat garlic bread in air fryer units compared to a microwave or a conventional oven, the primary difference lies in air circulation. Microwaves rely on water molecule agitation, which often results in gummy, chewy bread that loses its structural integrity within minutes of cooling.
Conversely, a standard oven takes a long time to preheat, often drying out the bread before it reaches the desired internal temperature. An air fryer uses rapid air technology to move heat around the food, effectively mimicking the effect of a professional convection oven on a smaller scale.
This appliance is specifically designed to crisp up the exterior while maintaining a soft, warm interior. Because the heating element is positioned close to the basket, you get immediate, intense heat that helps revive the butter absorption within the bread slices.
You aren’t just warming the bread; you are essentially re-toasting the surface to bring back the contrast between the bread crust and the soft, garlicky center. For anyone who values a high-quality food texture, the air fryer is the most efficient tool in your kitchen for saving leftover bread.
Optimal Temperature and Timing Guidelines
Finding the right balance of time and temperature is the secret to successful reheating. If you set the temperature too high, the garlic butter will burn before the center of the loaf is warm. If you set it too low, you risk the bread becoming tough rather than crispy.
Generally, a temperature between 320°F and 350°F is the sweet spot. This range provides enough power to melt the butter and heat the bread without scorching the garlic or herbs that are often found on the surface.
The heating time will vary depending on the thickness of your bread and whether it was refrigerated or left at room temperature. A good rule of thumb is to start with a short interval and check the progress. Most slices only need three to five minutes to achieve that perfect golden brown appearance.
If you are dealing with a thicker piece or a large chunk of a baguette, you might need an extra minute or two. Always keep an eye on the color to ensure the edges don’t become overly dark, as the concentrated heat can work quickly.
Managing Moisture for the Perfect Bread Texture
One of the biggest challenges when reheating leftovers is moisture retention. Without proper care, bread can quickly transition from stale to rock-hard.
If you notice your bread is particularly dry before you start, you can lightly mist it with water or add a tiny bit of extra butter to the surface. This helps rehydrate the crust and ensures that the heat doesn’t pull all the remaining moisture out of the crumb during the cooking process.
Another technique involves the use of protective barriers. While aluminum foil is often used in ovens, it can sometimes block the airflow in an air fryer, preventing the bread from getting crispy. If you find your bread is browning too fast, try using a small piece of parchment paper underneath to prevent the garlic butter from dripping onto the bottom of the basket.
This keeps your appliance clean and prevents the smoke that occurs when butter burns on the heating element. Balancing the need for airflow with the need to keep the bread moist is a refined culinary technique that pays off in flavor.
Safety and Preparation for Reheating Leftovers
Food safety is paramount when reheating any item that contains dairy or fats. If your garlic bread has been sitting out at room temperature for several hours, it is best to discard it rather than attempt to reheat it.
When you decide to move forward, ensure the bread is placed in a single layer to maximize air circulation. If you crowd the basket, the air cannot move around the slices, which leads to uneven heating and soggy spots where the slices touch each other.
It is also important to consider the condition of the bread before you start the process. If the bread was stored in an airtight container, it might retain more moisture, meaning it will reheat more evenly. If it was left exposed to air, it might be quite stale, in which case you should definitely opt for a lower temperature for a slightly longer duration.
This gentle approach allows the heat to penetrate to the center without turning the exterior into a hard, unpalatable shell. Always use tongs to handle the bread, as the butter will be extremely hot once the process is complete.
Comparing Common Reheating Methods
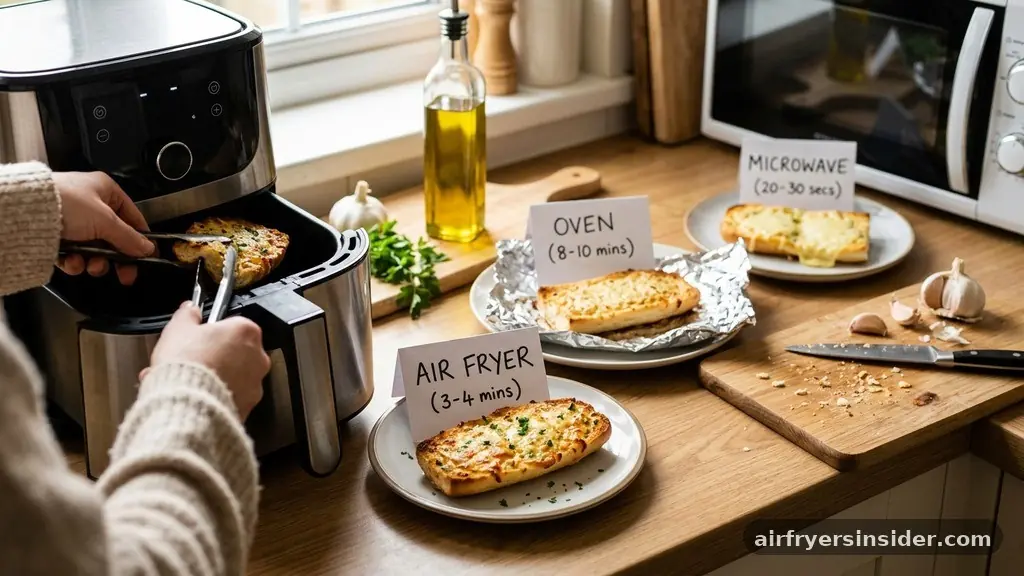
To understand why the air fryer is often the superior choice, it helps to compare it against other common methods. Each approach affects the final bread texture and flavor profile differently.
| Method | Time Required | Texture Outcome | Ease of Use |
|---|---|---|---|
| Air Fryer | 3-5 Minutes | Perfectly crispy and soft | High |
| Microwave | 30-60 Seconds | Chewy and rubbery | Very High |
| Conventional Oven | 10-15 Minutes | Good, but can dry out | Low (Preheating) |
| Toaster Oven | 5-8 Minutes | Crispy but uneven | Medium |
As the table illustrates, the air fryer offers the best balance of speed and quality. While the microwave is faster, the sacrifice in texture is significant.
The oven is reliable but inefficient for small portions. The air fryer sits in the middle, providing a professional-grade result with the convenience of a quick, countertop appliance.
Customizing Your Reheating Process
You can elevate your reheated bread by adding a few personal touches during the process. If the bread feels a bit lackluster, consider brushing a tiny amount of fresh garlic butter or olive oil on the surface before placing it in the basket.
You could also sprinkle a pinch of dried oregano, parsley, or even a little bit of grated parmesan cheese over the top. These small additions breathe new life into the dish and make it feel like a fresh preparation rather than a recycled leftover.
If you are a fan of heat, a dash of red pepper flakes can provide a nice contrast to the richness of the butter. Because the air fryer is so efficient, these toppings will toast perfectly in the short time it takes to heat the bread through.
Experimenting with these additions allows you to customize your experience and ensures that you never get bored with your leftovers. Just remember that anything you add will be subject to the intense heat of the appliance, so choose ingredients that can handle a quick toast without burning.
Common Mistakes to Avoid
Even with a reliable appliance, there are common pitfalls that can ruin your results. One of the most frequent errors is failing to preheat the air fryer.
While it might seem like an unnecessary step for a quick reheating task, a preheated basket ensures that the bread starts crisping the moment it hits the heat. If you put the bread in a cold basket, it will sit there while the temperature rises, which can lead to the bread becoming limp or greasy as the butter melts into the crumb.
Another mistake is forgetting to clean the basket after previous uses. If there are burnt crumbs or oil residue at the bottom, they will smoke as soon as they heat up, potentially giving your garlic bread a bitter, charred flavor. Always wipe out the basket before you begin.
Additionally, avoid using too much oil or butter on the bread. Since most garlic bread is already quite rich, adding more fat can make the bread feel heavy and greasy rather than light and crispy. Stick to a light touch to maintain the integrity of the original recipe.
Topical Gaps: Addressing Specific Bread Types
Many people wonder if they should handle different types of bread differently. For example, a thick, crusty sourdough garlic bread requires a slightly different approach than a soft, store-bought dinner roll style of garlic bread.
For crusty, dense bread, you should aim for a lower temperature for a longer period to ensure the middle warms through without the crust becoming too hard. If you are reheating soft, pillowy rolls, a higher temperature for a very short duration is best to keep them from turning into croutons.
Another common question involves pre-packaged or frozen garlic bread that has already been cooked. If you are reheating a slice of frozen garlic bread that was previously baked, the air fryer is actually the best way to return it to its original state. Because it contains a high fat content, it doesn’t need much help, but you must be careful with the timing.
Frozen items that have been thawed and then need reheating can be tricky; always ensure the internal temperature is hot enough to be safe for consumption. When in doubt, a quick check with a food thermometer can provide peace of mind.
Essential Tips for Success
To ensure you get the best results every time, keep these best practices in mind. Consistency is key when dealing with high-heat appliances.
- Always preheat your air fryer for at least two to three minutes before placing the bread inside.
- Arrange your bread slices in a single layer, ensuring there is enough room for air to circulate between them.
- Check the bread at the three-minute mark; it is better to add more time than to burn it.
- If using parchment paper, ensure it is weighted down by the bread so it doesn’t fly up into the heating element.
- Use tongs to remove the bread to avoid getting burned by the hot butter or the basket walls.
- Let the bread sit for one minute after removing it; this allows the residual heat to distribute evenly.
Following these simple steps will help you avoid the frustration of burnt edges or cold centers. The goal is to recreate that fresh-baked experience, and with a little bit of attention to detail, you can consistently achieve that perfect balance of a crispy exterior and a warm, buttery center.
Frequently Asked Questions
Can you put garlic bread wrapped in foil in an air fryer?
While you can, it is generally not recommended. Foil blocks the air circulation that makes air fryers effective. If your bread is browning too quickly, use foil as a loose tent for the first half of the heating time, then remove it to finish the crisping process.
How long should I heat up garlic bread in the air fryer?
For most slices, three to five minutes at 350°F is sufficient. Thicker loaves or cold, refrigerated bread may require an extra minute or two. Always monitor the progress closely after the three-minute mark to prevent burning the garlic or herbs on the crust.
Is it necessary to preheat the air fryer before reheating bread?
Yes, preheating is highly recommended. Starting with a hot basket ensures the bread begins to crisp immediately, preventing the butter from soaking into the crumb and making it soggy. A quick two-minute preheat is usually enough to get the internal temperature of the unit ready.
How can I keep the bread from drying out?
If your bread seems stale or dry, lightly mist it with water before reheating. This adds a small amount of moisture that helps the bread stay soft on the inside. Alternatively, keep the heat on the lower end of the recommended range to avoid overcooking the crust.
Conclusion
Reheating garlic bread in air fryer models is a simple yet effective way to ensure no delicious leftovers go to waste. By focusing on temperature control, proper air circulation, and moisture management, you can easily restore the texture and flavor of your favorite side dish. Whether you are dealing with a crusty baguette or soft slices, the air fryer provides the precision needed to achieve a result that rivals the original bake.
Remember to avoid crowding the basket, keep an eye on the timing, and don’t be afraid to add a small touch of fresh butter if the bread needs a boost. With these techniques, your reheated garlic bread will remain a highlight of your meal, proving that leftovers can be just as enjoyable as the first serving. Feel free to experiment with your own timing and toppings to find exactly what works best for your specific appliance.