

Mastering the art of reheating chicken tenders in an air fryer allows you to reclaim that fresh-from-the-fryer crunch without the sogginess often associated with microwaves. Many home cooks struggle with leftover poultry that turns rubbery or loses its signature crust, but the right approach transforms yesterday’s meal into a satisfying snack.
By leveraging rapid air technology, you can restore the ideal texture and taste of your tenders in just a few minutes. Whether you are dealing with fast-food leftovers or homemade batches, understanding the mechanics of heat distribution ensures your meal remains juicy on the inside while regaining a perfect, golden brown exterior.
Understanding the Mechanics of Air Fryer Reheating
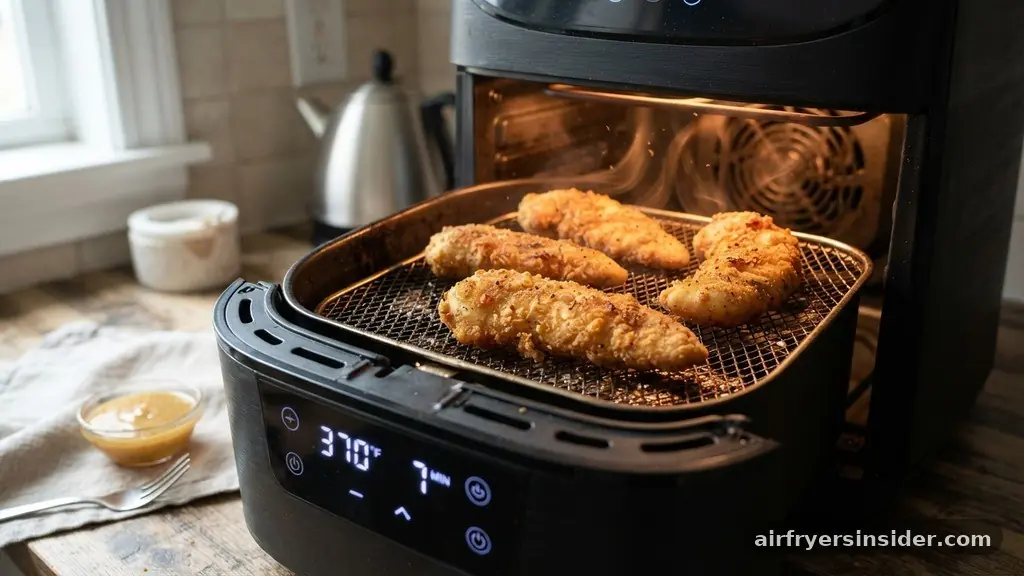
The primary challenge when dealing with leftover fried food is the loss of moisture coupled with a softening of the breading. Traditional ovens often take too long to preheat, which can dry out the center of the meat before the exterior has a chance to crisp up.
Air fryers, however, use intense convection heat to circulate hot air rapidly around the food. This process mimics deep frying by essentially dehydrating the surface of the breading quickly, which is exactly what you need to achieve that satisfying crunch.
When you focus on how to reheat chicken tenders in an air fryer, you are essentially managing the thermal conductivity of the crust. Because the breading acts as an insulator, the center of the chicken breast takes longer to warm up than the outside. If the temperature is too high, the exterior will burn before the interior reaches a safe serving temperature.
If it is too low, the chicken sits in the appliance too long, leading to dry meat. Finding the sweet spot—typically between 350°F and 375°F—is essential for balancing texture and heat.
The Importance of Proper Preheating
Many people skip the preheating phase, but it is a critical step for consistent results. An air fryer that starts at room temperature will take several minutes to reach the target heat, during which time your food is essentially just sitting in a warm chamber.
This can lead to the breading absorbing residual moisture from the basket, making it impossible to get that crispy finish later. Preheating ensures that the moment your tenders hit the basket, the process of restoring the crunch begins instantly.
Most modern kitchen appliances like a Ninja Foodi or a Cosori model reach their optimal cooking temperature in about three to five minutes. During this time, the internal components heat up, creating a steady flow of hot air.
By placing your chicken into a preheated environment, you reduce the overall reheat time, which is the most effective way to prevent the meat from drying out. Even if you are in a rush, giving the unit just a few minutes to stabilize will significantly improve the final outcome of your meal.
Optimizing Air Circulation in the Basket
Air circulation is the secret sauce behind the effectiveness of an air fryer. If you overcrowd the basket, the airflow is obstructed, creating cold spots and uneven heating.
To ensure every piece of chicken gets equal exposure to the circulating heat, you must arrange your tenders in a single layer. If you have a large batch, it is far better to run two shorter cycles than to stack the pieces on top of one another.
If your air fryer basket is particularly small, consider using a wire rack to elevate the chicken slightly. This allows the air to flow underneath the tenders, ensuring the bottom breading stays just as crispy as the top.
Avoid using parchment paper if you want maximum crispiness, as it acts as a barrier that prevents the air from circulating around the bottom of the food. If you must use a liner for easy cleanup, choose a perforated version that allows air to move freely through the basket.
The Role of Oil and Moisture Management
While the chicken is already cooked, a light touch of fat can work wonders for texture. A quick spritz of oil mist helps rehydrate the breading just enough to facilitate the crisping process.
You don’t need much; a light coating is sufficient to help the heat transfer more efficiently. If your tenders look particularly dry, this small amount of oil acts as a bridge, helping the heat penetrate the breading without scorching it.
Preventing Dry Meat During Reheating
* Choose a lower temperature (350°F) for thicker pieces to ensure the center warms without overcooking.
* Limit the reheat time to 3-5 minutes, depending on the thickness of the meat.
* Use a food thermometer to check that the internal temperature reaches at least 165°F if you are concerned about food safety.
* Flip the tenders halfway through the process to ensure even heating on both sides.
Keep in mind that the goal is to warm the food, not to cook it from scratch. Overcooking is the primary reason why reheated chicken tastes like cardboard. By keeping the duration short, you preserve the natural juices inside the breading, ensuring that each bite remains tender and flavorful.
Comparing Reheating Methods
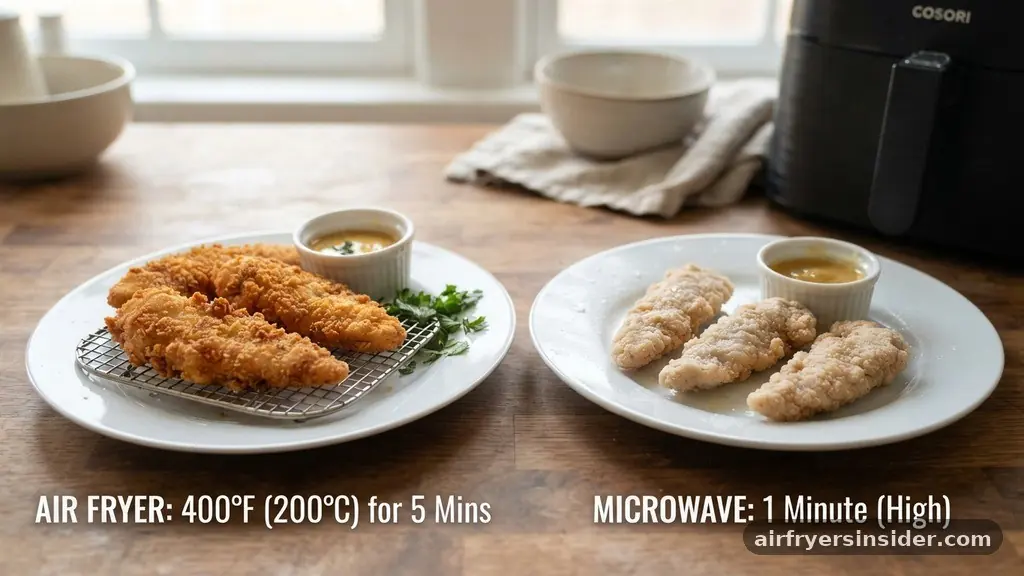
Choosing the right tool for the job is vital for food quality. While a microwave is fast, it is arguably the worst way to reheat fried foods because it uses water molecules to create heat, which inevitably results in soggy breading. The following table highlights why the air fryer is superior for maintaining quality.
| Method | Texture Result | Moisture Retention | Speed |
|---|---|---|---|
| Microwave | Soggy/Soft | Poor | Fast |
| Oven | Crispy | Moderate | Slow |
| Air Fryer | Crispy/Fresh | High | Optimal |
As shown in the table, the air fryer offers the best balance of speed and texture. It provides the crispiness of an oven with the efficiency of a microwave, making it the clear winner for anyone looking to enjoy leftovers that taste almost as good as the day they were first prepared.
Handling Different Types of Breaded Chicken
Not all chicken tenders are created equal. Some are heavily breaded, while others feature a thinner, tempura-style coating.
Thicker, more rustic breading tends to hold up better during the reheating process because it can withstand higher temperatures for longer. If you are reheating thin-crust tenders, you should lower the temperature to 330°F or 340°F to avoid burning the delicate outer layer.
If you are dealing with sauced tenders, the approach changes significantly. Sauce adds moisture that can turn into steam, which is the enemy of a crispy crust.
If your tenders are heavily glazed in barbecue or buffalo sauce, place them in the air fryer for the first few minutes, then quickly brush on a little extra sauce right before serving. This ensures the flavor is there without compromising the structural integrity of the breading.
Addressing Topical Gaps in Reheating
A common question that often goes unaddressed is how to handle tenders that have been in the refrigerator for more than 24 hours. As time passes, the moisture from the meat migrates into the breading, a phenomenon that makes it nearly impossible to restore the original crunch.
In these cases, you might need to use a “two-stage” approach. Start by heating the chicken at a lower temperature to bring the center to room temperature, then finish with a quick 60-second blast at a higher temperature (400°F) to crisp the surface.
Another gap in common knowledge involves the use of cooking spray. Many users are afraid that adding extra oil will make the food greasy. In reality, a tiny amount of oil is essential for the Maillard reaction, which is the chemical process responsible for the golden brown color and deep flavor of fried food.
Without this, the breading will simply dry out and become brittle rather than crispy. Use a high-smoke-point oil like avocado or grapeseed oil for the best results.
Essential Safety Considerations
Food safety remains paramount when dealing with leftover poultry. Always ensure that the chicken is stored in the refrigerator at or below 40°F and that it has not been left out at room temperature for more than two hours.
When reheating, the goal is to bring the chicken to a safe internal temperature of 165°F. While you are primarily warming it, using a food thermometer is the only way to be absolutely certain that the meat is safe to eat.
Never reheat the same piece of chicken more than once. Every time you heat and cool food, you increase the risk of bacterial growth. If you have a large batch of leftovers, only pull out what you intend to eat immediately.
Keep the rest in the refrigerator until the very moment you are ready to put them into the air fryer. This simple practice ensures that your meal is not only delicious but also safe for consumption.
Refining Your Technique for Consistent Success
Consistency comes from practice and understanding your specific appliance. Not all air fryers are calibrated the same way; some run hotter than others.
The first time you reheat a new brand of tenders, start with a conservative estimate—perhaps three minutes—and check them. You can always add more time, but you cannot fix a burnt piece of chicken.
Pay attention to the sound and smell of the cooking process. A distinct, sizzling sound often indicates that the oil in the breading is reaching the right temperature to crisp up.
If you smell the breading burning, pull the basket out immediately. By staying attentive during those few minutes of reheat time, you will master the nuances of your specific device, ensuring that your leftovers are consistently golden brown and delicious.
Frequently Asked Questions
Can you reheat already cooked chicken tenders?
Yes, reheating cooked chicken tenders is perfectly safe as long as they were stored properly in the refrigerator. The air fryer is the ideal tool for this because it restores the crispy texture of the breading while warming the meat thoroughly without drying it out.
What is the best temperature to reheat chicken tenders?
The best temperature is typically between 350°F and 375°F. This range provides enough heat to crisp the exterior breading while ensuring the interior reaches a warm serving temperature without overcooking the meat, which would otherwise result in a dry and chewy texture.
How do I stop the breading from falling off?
To keep the breading intact, avoid flipping the tenders too aggressively. Use silicone-tipped tongs to turn them gently halfway through the cooking process. Additionally, ensure they are not overcrowded in the basket, as shifting them around in a cramped space is the main cause of breading loss.
Is it necessary to use oil when reheating?
While not strictly required, a light spritz of oil helps significantly. It rehydrates the breading and facilitates better heat conduction, which is necessary to achieve that fresh, golden-brown crunch. A very light coating is all you need to see a noticeable improvement in texture.
Conclusion
Mastering the process of reheating chicken tenders in an air fryer is a simple way to reduce food waste while enjoying a high-quality meal. By focusing on preheating, maintaining proper air circulation, and using a light mist of oil, you can consistently achieve that coveted crispy texture that makes fried food so appealing. Always prioritize food safety by ensuring your leftovers are handled correctly and checked for temperature, but don’t be afraid to experiment with the timing to suit your specific appliance.
With these techniques in your kitchen repertoire, you will never have to settle for soggy leftovers again. Start practicing these steps with your next batch, and you will quickly see how easy it is to elevate your leftover game.
Meta Description: Learn the professional secrets to reheating chicken tenders in an air fryer. Discover how to get crispy, golden results without drying out the meat.


